• Hello!

    Either you have not registered on this site yet, or you are registered but have not logged in. In either case, you will not be able to use the full functionality of this site until you have registered, and then logged in after your registration has been approved.

    Registration is FREE, so please register so you can participate instead of remaining a lurker....

    Please be certain that the location field is correctly filled out when you register. All registrations that appear to be bogus will be rejected. Which means that if your location field does NOT match the actual location of your registration IP address, then your registration will be rejected.

    Sorry about the strictness of this requirement, but it is necessary to block spammers and scammers at the door as much as possible.

Custom Viv & 20L Cabinet

Marica

New member
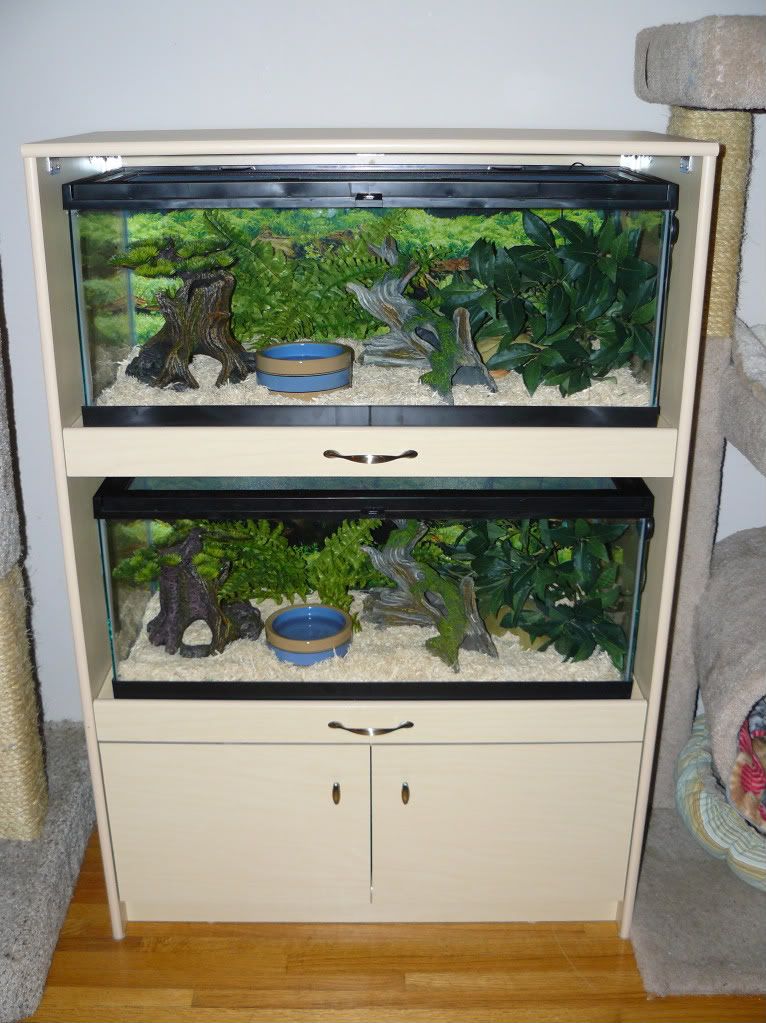
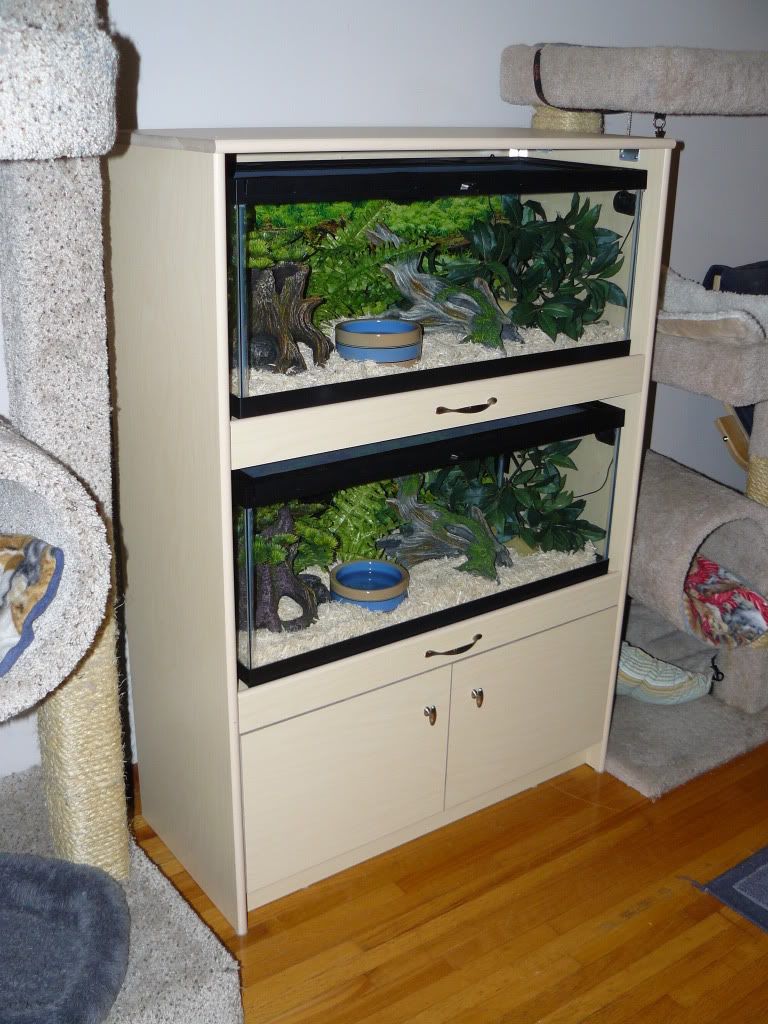
Due to lack of space and multiple felines we had some custom stackable vivs with stand made this summer for our adult corns.

October2009-Partial0371-2.jpg


However, while waiting for the above to be made we went to a show and... came home with 2 yearling corns. Once we got the unit we were able to move the yearlings into the 20L tanks, which are currently on top of our dresser.

After toying with the idea of making a similar unit ourselves we decided it'd be best to make use of the tanks we already have and came up with the below design (thanks Raynefyre for introducing me to Google SketchUp).

Cabinet.jpg


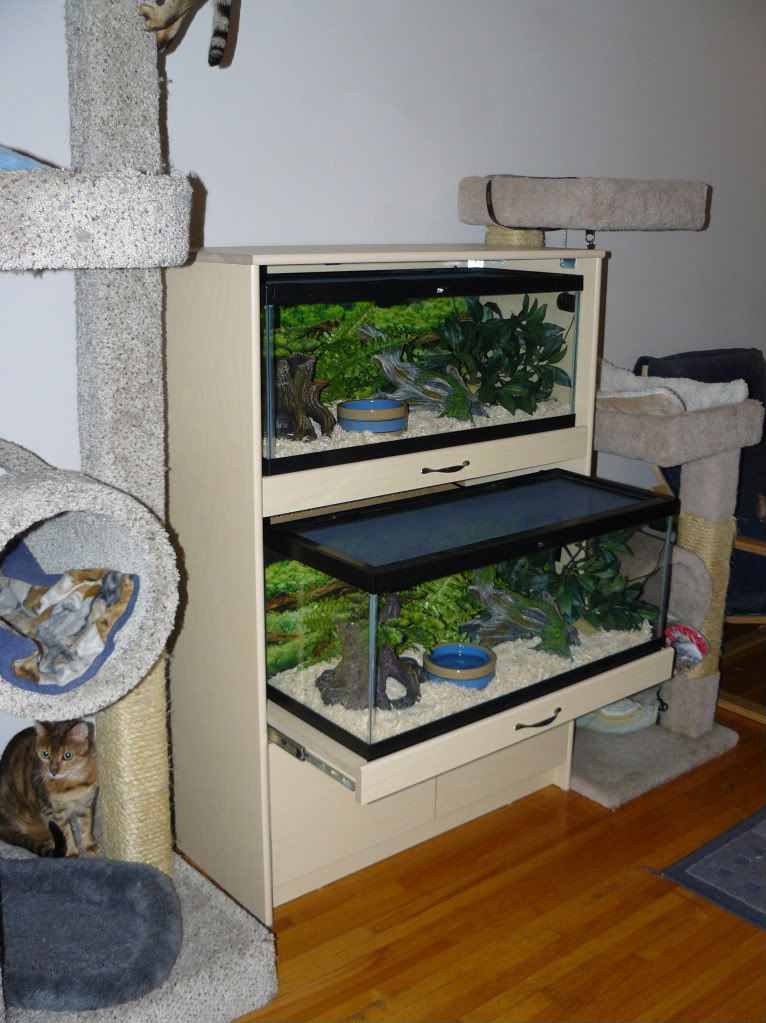
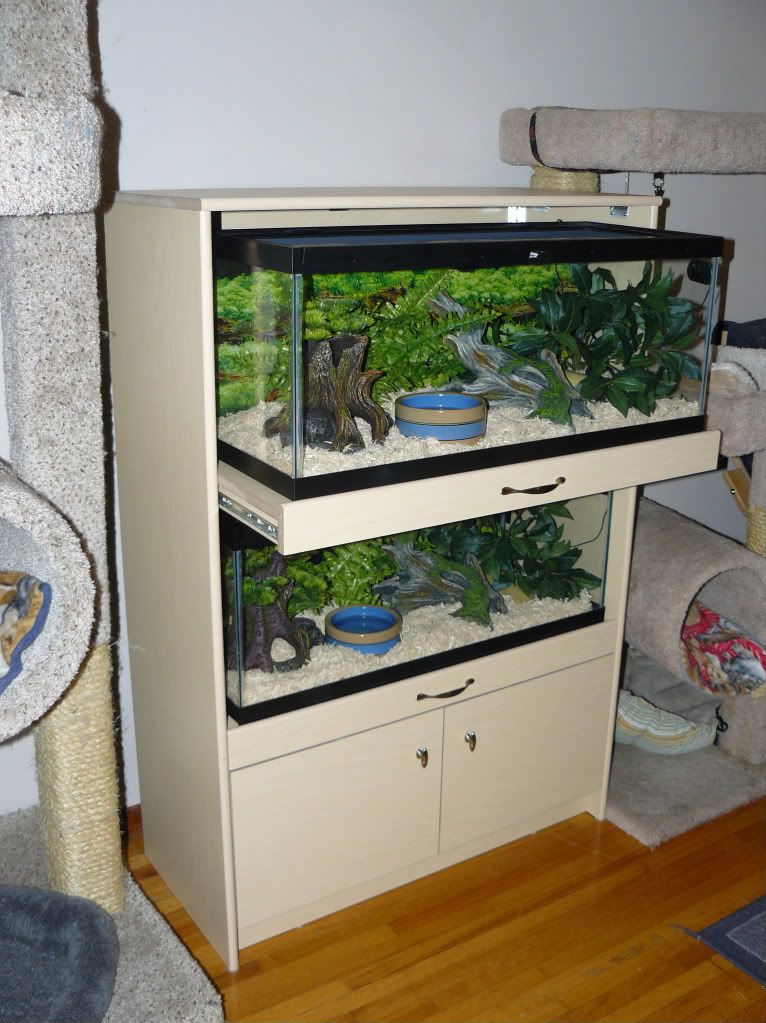
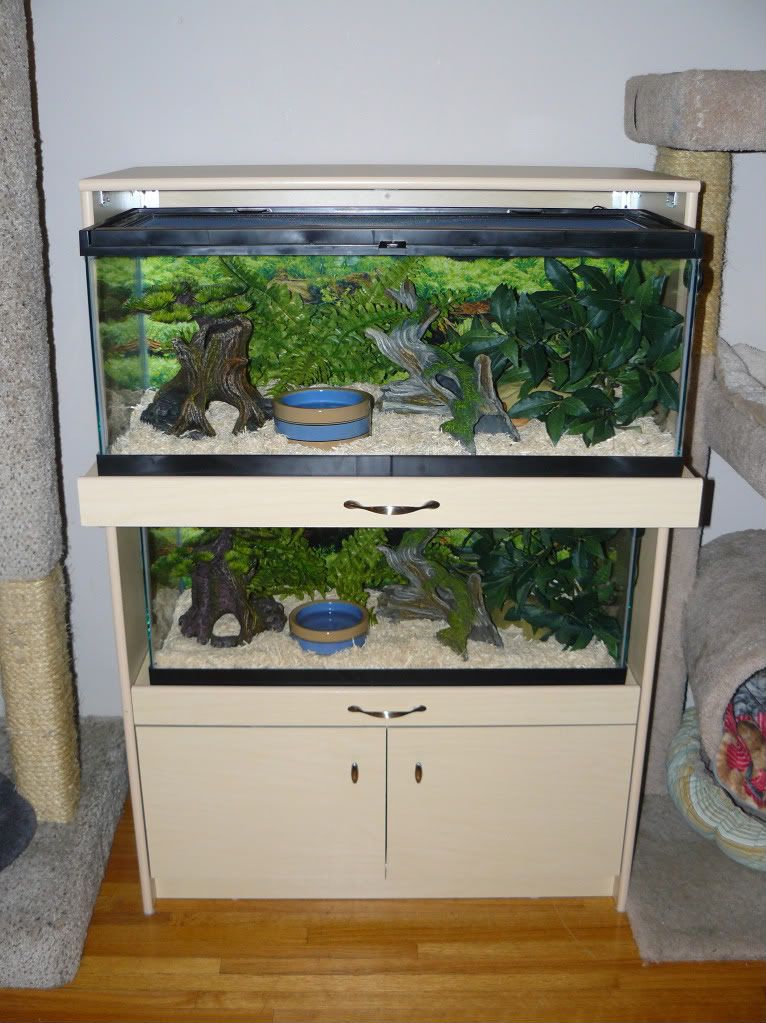
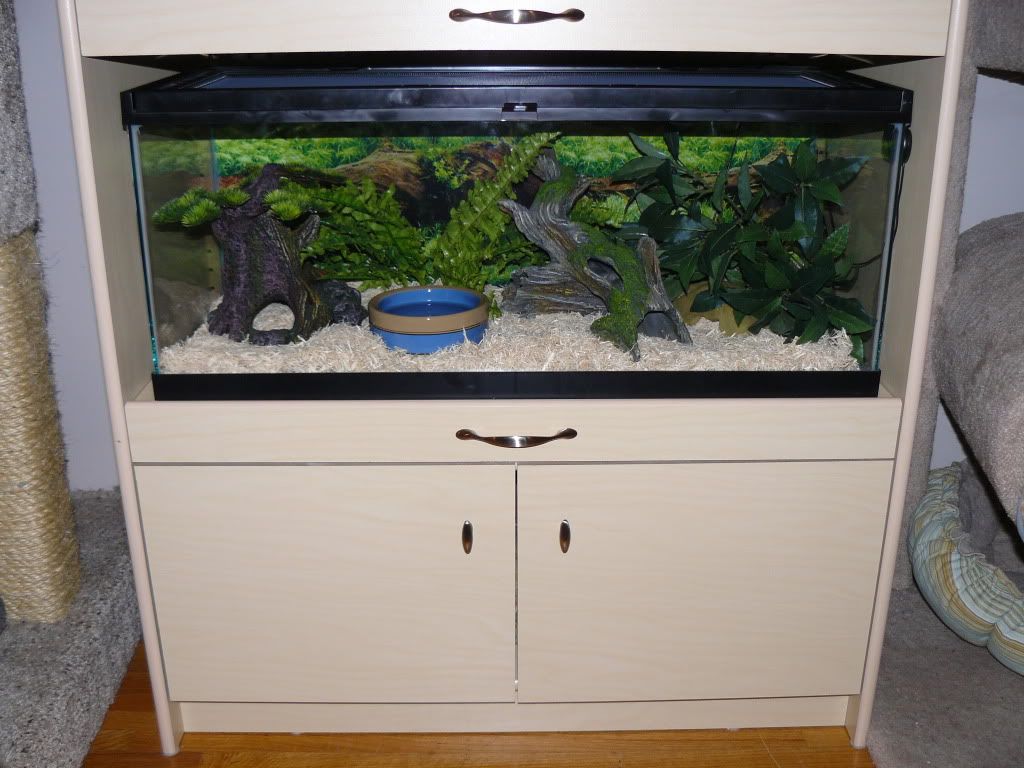
The cabinet is 4' tall and 34" wide, allowing for approx. 1" clearance on either side of the tank and 2" above. The tanks are on trays that have medium-duty full extension slides so that we can pull them out to remove the lid and have full access to the interior of the vivs.

I'm hoping to build this cabinet over the holidays with my dad. Any comments or suggestions welcome. Thanks for looking.
 
Those are awesome Marcia! :) Glad you liked the program. I love your displays you made. Do you have construction pics? I might even have to have you over to make one with me! ^_^
 
Love the design, I am modifying it slightly and having my teen(apprentice carpenter) build me one in his carpentry class with 3 units for my 30 gal longs.

I am going to have him put a false front bottom panel(held on by magnetic door closures) under the storage doors where there will be telescoping legs so that if the floor is not level I can level the unit as needed.

Another modification will be air vents on the sides where you have each of the 2 inch gaps to ensure adequate air flow.

The final modification will be electrical hole grommets for the UTH cords to be fed through, still deciding if they are best put on the side or back.

Thanks so much for sharing, I have been wanting to have him build me something that would use my current vivs and still be a nice piece of furniture!!
 
Thanks for the compliments and suggestions. If all goes well we may just be building a few more Aislin ;)

Asbit, I really like the telescoping legs idea. Also, we were thinking of using pegboard on the back for ease of wiring and ventilation.
 
Marcia, I originally thought of peg board too, but then thought I am putting the expense into having this built so that it houses my snakes and looks like a nice piece of furniture and I just feel that, for me, the peg board will take away from it, esp. if there ever came a time we used it for something other than vivs. Therefor I would rather have nice neat vents put in along the sides. Most of my daycare children are sleeping for the next 2 hours so I will see if I can learn the Google SketchUp quick enough to show you what I am intending, if not I will post it later.
 
Originally I was going to attach a solid piece to the back as well and use grommets as in our custom, but as it will hardly be visible and require more work and material we decided it wasn't necessary for us. Although it will be a simple alteration should we change our minds. The ventilation isn't a huge concern considering the 2 inch gap at the top, 1 would probably suffice. I'm not sure that adding vents to the side would really improve air flow to the top of the tanks and would detract from the esthetics especially if the unit may eventually be used as a regular cabinet.
 
You know your probably right, esp considering I am planing on my snakes being in the finished basement which never gets really hot, unless my 11 yr old gets stupid with the gas fireplace. I guess I was just thinking of how hot it can get in the bedrooms upstairs where the tree tanks I am thinking of are currently situated. This is why I love this site lots of discussion helps to get things figured out just right!!
 
Love the design, this may be the one I go with :)

Not to jack the post, but Asbit what are the measurements/dimensions of the 30 longs?
 
That's awesome! Well done!I downloaded google sketchup but when I try to use it it just says not responding??
 
Well after 3 full days and plenty of setbacks we finally got it done...

Cabinet021.jpg


Cabinet017.jpg


Cabinet035.jpg


Cabinet038.jpg


Cabinet037.jpg


Cabinet014.jpg


And of course the inhabitants...

Athena

32101_64156_Large_P4qehkFOWD.jpg


and Helo

32100_69609_Large_GxOMVn4nbYBRNG.jpg
 
Well, the 16" x 96" panels were not all the same dimensions, some were only 15". The first day was cutting all the pieces, the second was mostly re-assessing, re-measuring and re-cutting. We used corner braces to attach adjoining pieces, which mostly worked. However, for the rectangular supports under the trays the braces pushed them out of alignment. We had to do some hammering of braces to get them squared off, and a lot of screwing, unscrewing, scraping, then re-screwing. Next time I'll use solid wood for the tray supports so that we can just whip out the nail gun. There was also quite a bit of adjusting to get the trays to slide smoothly.

While the shelving seemed like the perfect material, I should have stuck with melamine as the finish on the shelving was easily dented and scratched. I was swooned by the rounded edge of the shelving, which we were able to use on almost all visible edges, but we could have just used a trim on the melamine to cover the exposed, unfinished edges.

Thankfully we kept note of all the final measurements in case we build another unit. I'm still quite pleased with how it turned out. It's nice to have the little ones out in our living room and not on our bedroom dresser. And the biggest bonus of all - and the whole reason for the design - we don't have to worry about the cats getting on top of our tanks.
 
Marcia what type of cat is that I see in the bottom of one of the pics, are all of your cats the same kind and how many do you have?
 
AWESOME Job! This definitely decides it, this will be the design I use! Congratulations on a great unit to be proud of!
 
Back
Top