• Hello!

    Either you have not registered on this site yet, or you are registered but have not logged in. In either case, you will not be able to use the full functionality of this site until you have registered, and then logged in after your registration has been approved.

    Registration is FREE, so please register so you can participate instead of remaining a lurker....

    Please be certain that the location field is correctly filled out when you register. All registrations that appear to be bogus will be rejected. Which means that if your location field does NOT match the actual location of your registration IP address, then your registration will be rejected.

    Sorry about the strictness of this requirement, but it is necessary to block spammers and scammers at the door as much as possible.

DIY Rat Rack

theneedmachine

New member
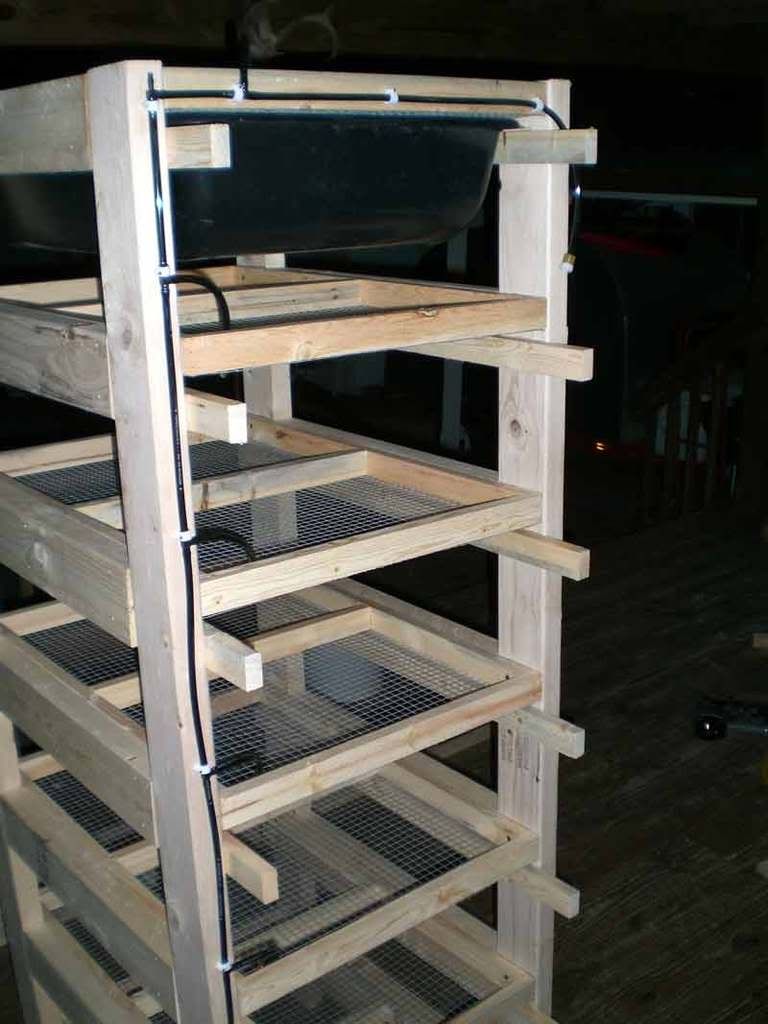
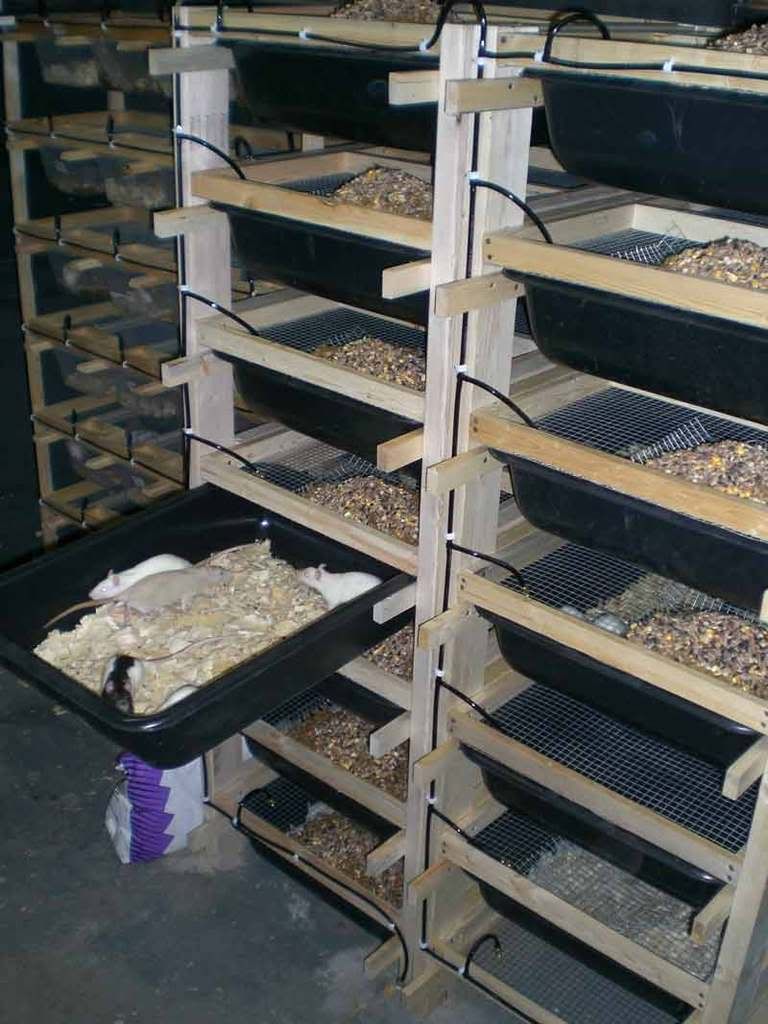
Worked out the kinks on my rat rack and built a couple of them...very inexpensive and easy to build. I did this write up for my site about a Year ago and thought I would share it with anyone looking to save money by breeding their own. Without looking at my receipts Im guessing this rack cost less than 150.00 bucks including the automatic watering system.
Estimate:
35.00 for tubs
30.00 for lumber
20.00 for hardware cloth (enough to do 2 racks)
60.00 watering system(water bottles can be used here to save money)
150.00 may sound a bit high...but when you consider how much time, and space they save it is well worth it. I priced large critter keepers for rats(hardly big enough for 1 or 2 rats) and they were 20.00 bucks ea. thats 140.00 for 7 Critter keepers that you cant stack! plus water bottles!!
Anyways here is a parts list:


  • 8 2"x4"x8's

  • 18 1"x2"x8's

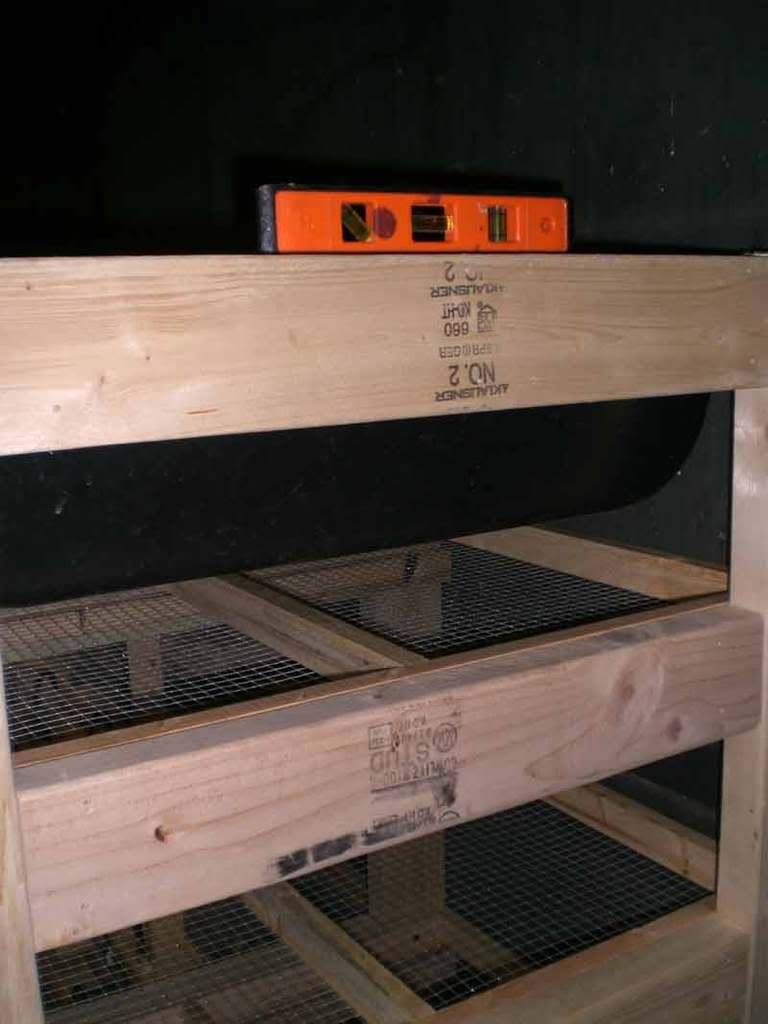
  • 7 Cement mixing tubs, these must be the tubs from home depo in order for the measurements to work.

  • 1 roll of 3'x25'x1/2" hardware cloth

  • 1 bottle of wood glue

  • 1 box of 1 5/8" wood screws

  • 3/8"Staples

Tools needed:


  • Chop Saw (circular saw, or hand saw will work)

  • Screw gun

  • speed square

  • tape measure

  • 1/8" countersink drill bit

  • pencil

  • Staple Gun

  • Tin snips

  • Hammer

  • wood clamps
Lets get Started!
You can figure a good 1/2 to full day to build your first one. I know some pictures are missing, I tried to remember to take them on every step but forgot some, I think there are enough here to get the point across.
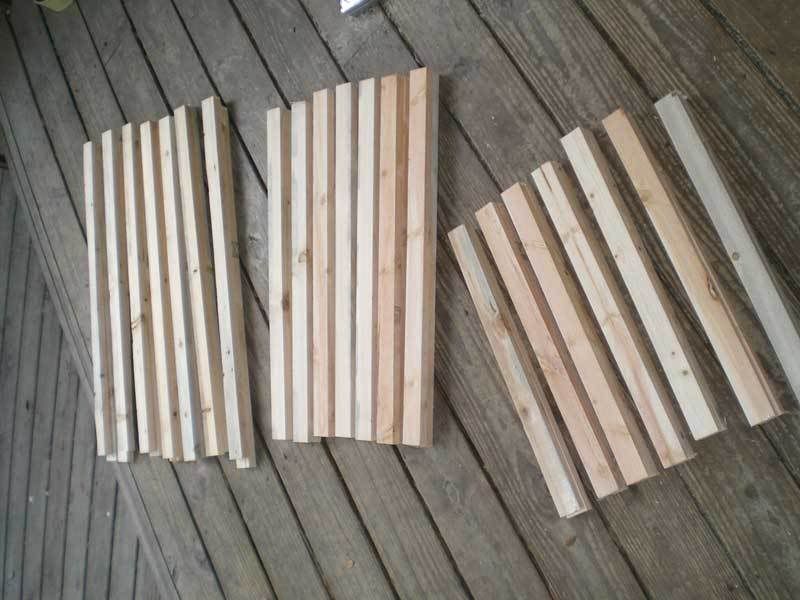
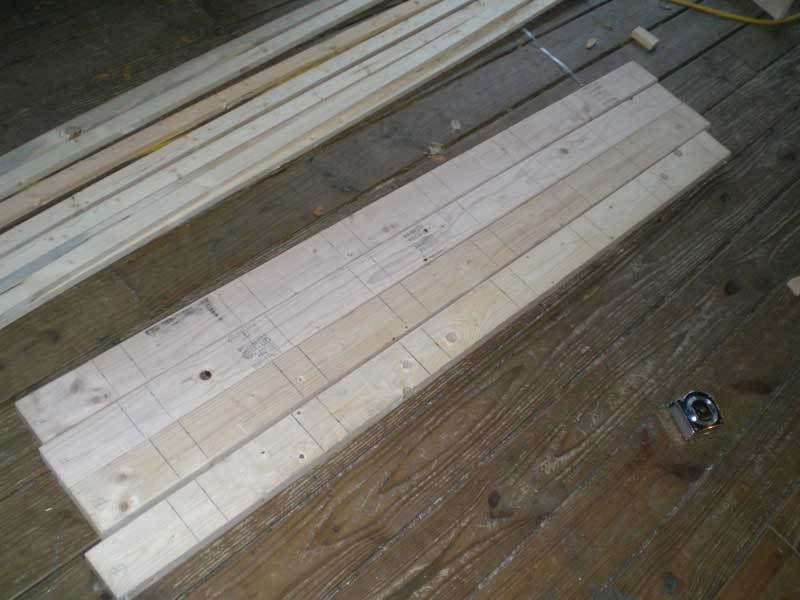
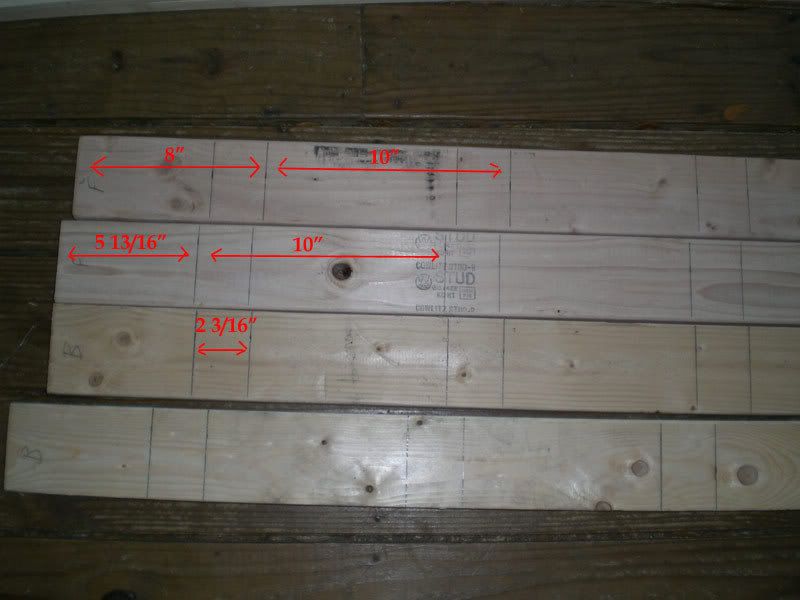
  • I started by cutting the framing for the tops of each cage, cutting them all at the same time saves time and your back.
  • Cut 14 1x2's by 20 1/8"
  • Cut 14 1x2's by 26 1/2"
  • Cut 14 1x2's by 31"
  • Cut 7 1x2's by 18 5/8"
pic1.jpg

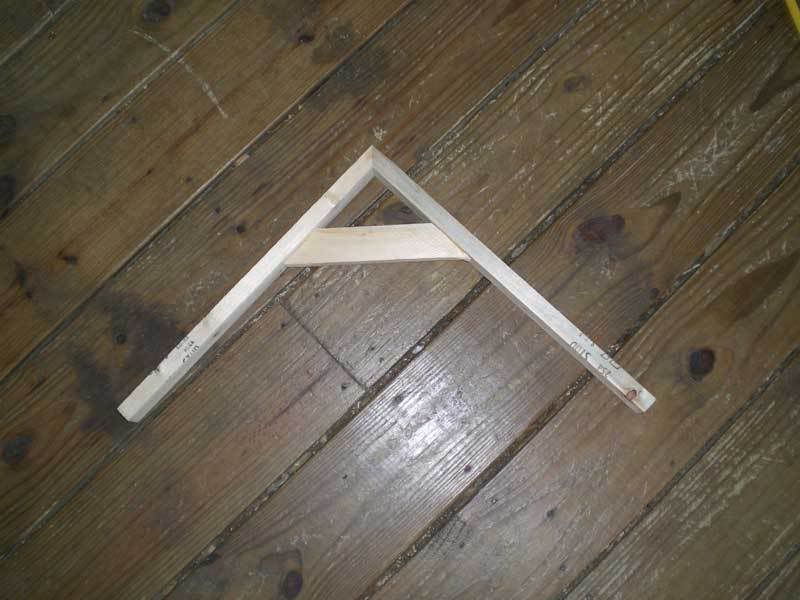
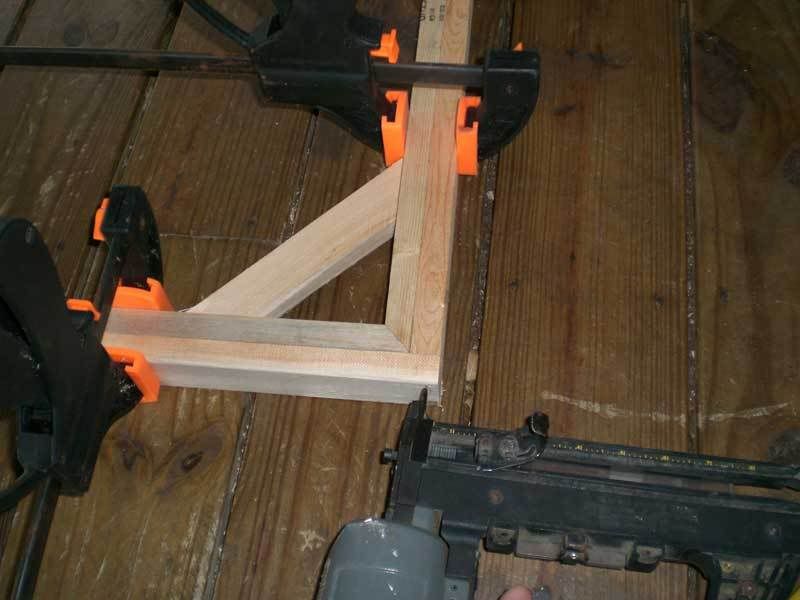
  • To put the frames together easily and to keep them square I made a simple jig.
  • this is not required but is very helpful, here is a pic of it
pic2.jpg

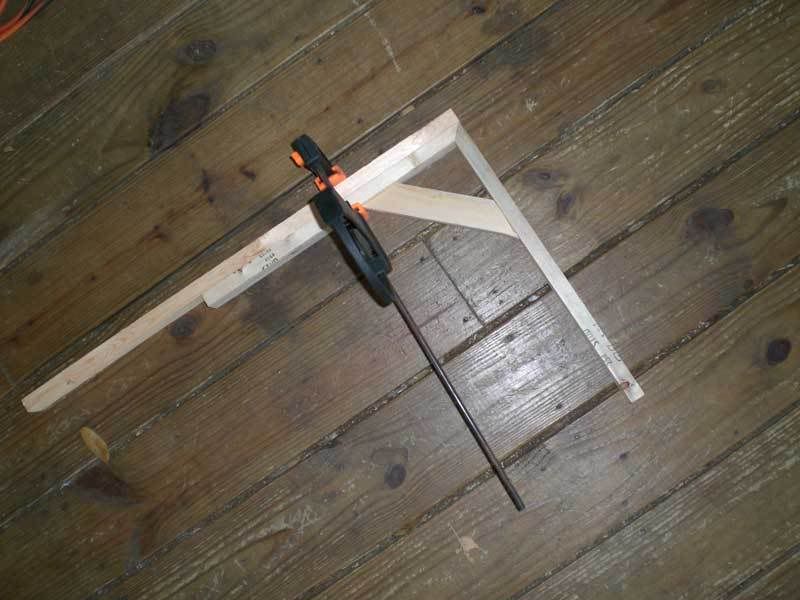
  • lay one 1x2x26 & 1/2" on one side of the jig and clamp it flush with the top as pictured below
pic3.jpg

  • Now apply glue to the top of the 1x2x26 & 1/2
pic4.jpg

  • Place a 1x2x20 & 1/8 on top as pictured below
  • clamp it snug
pic5.jpg

  • Here I used a nail gun only because its faster, however screws are really the better way to go.
pic6.jpg

  • pre-drill 2 holes in the top 1x2x20 &1/8 using a countersink bit, this will help keep the 1x2's from splitting.
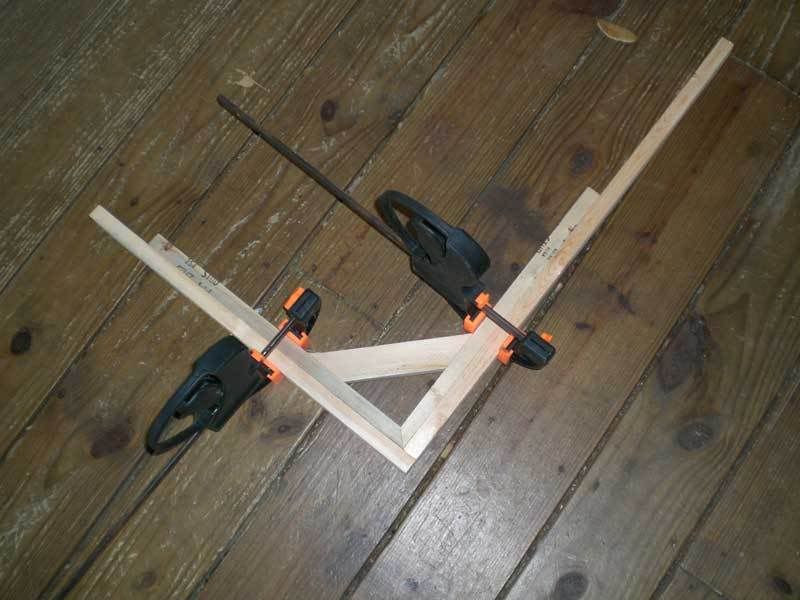
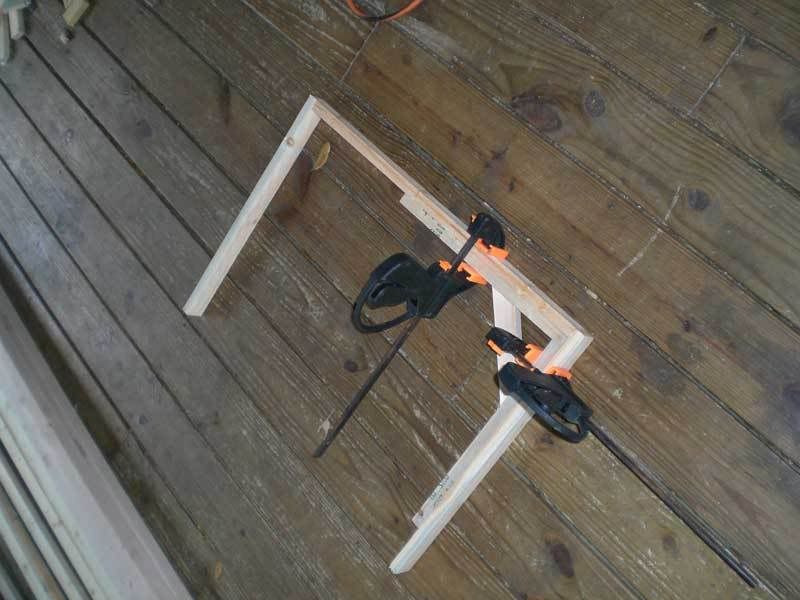
  • Screw the two boards together, and unclamp them both
  • Repeat this to all 4 corners on the frame.
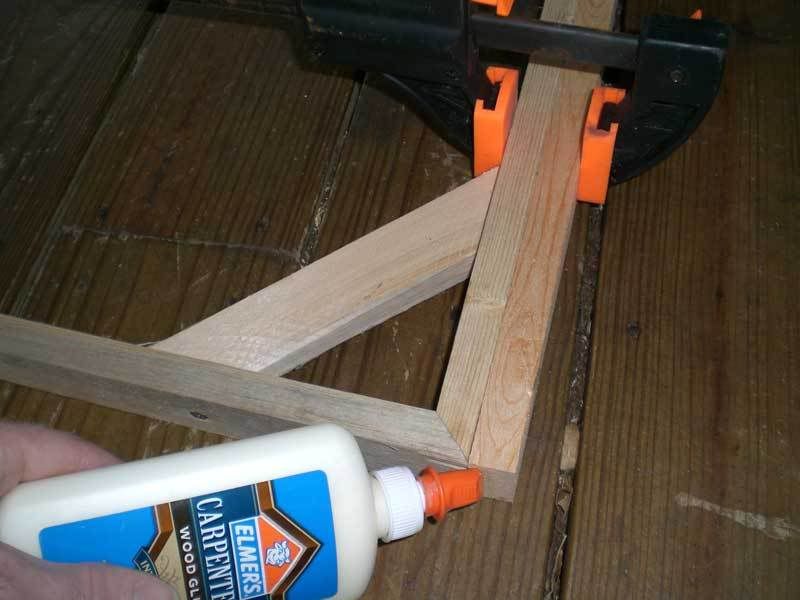
  • Remember to use the Glue!
pic7.jpg


pic8.jpg

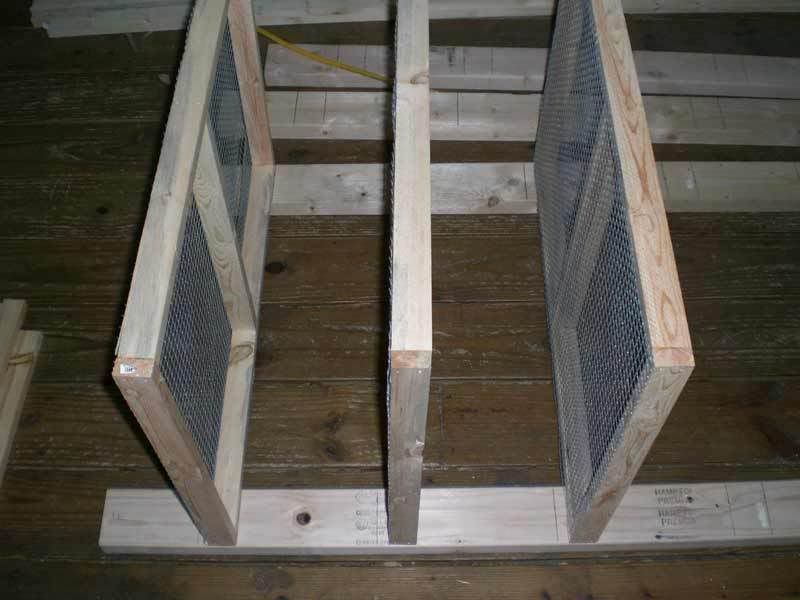
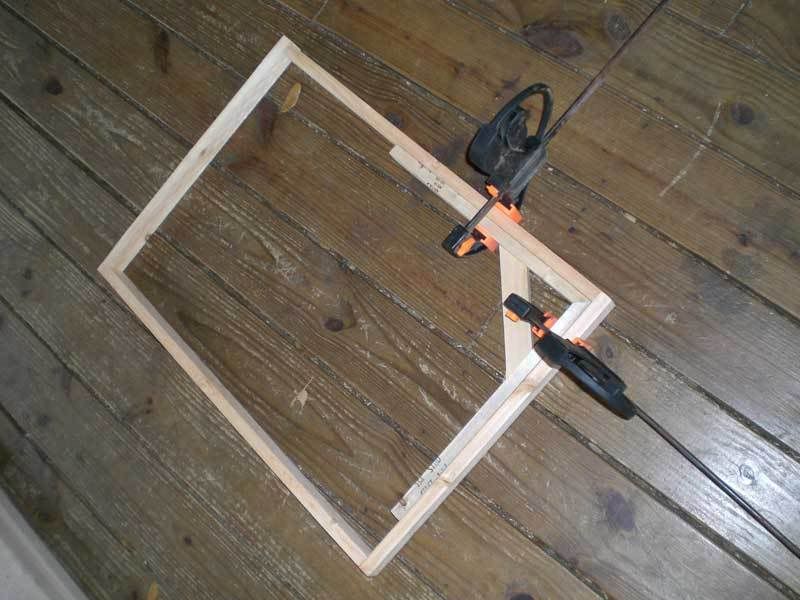
  • Next find your center point of the frame on both 1x2x26 &1/2 I just measured it to an even 13"
  • Here you will attach the center support the 1x2x18 & 5/8
  • If you dont have a nail gun, here you will pre-drill glue and screw
pic9.jpg

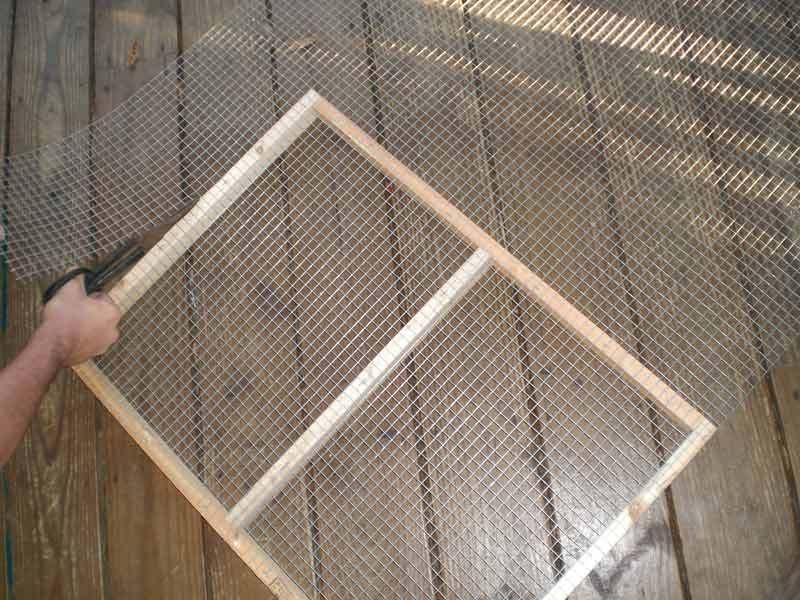
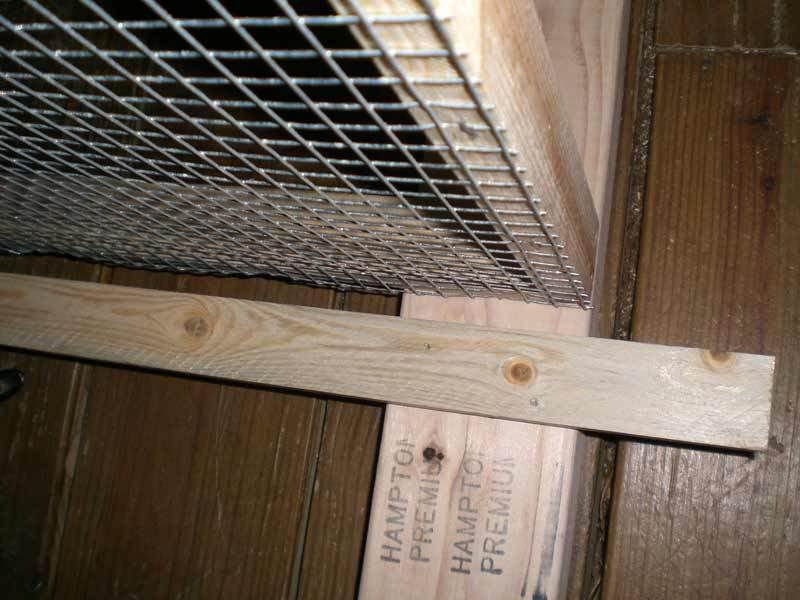
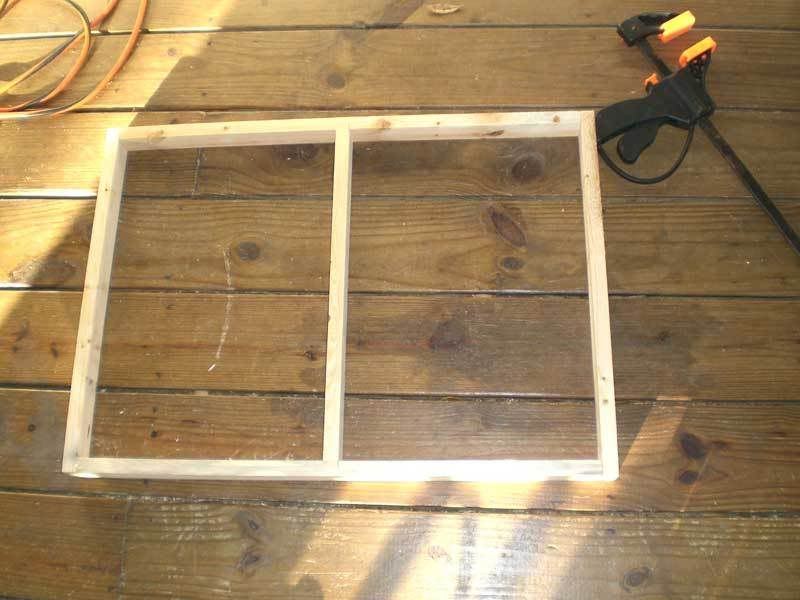
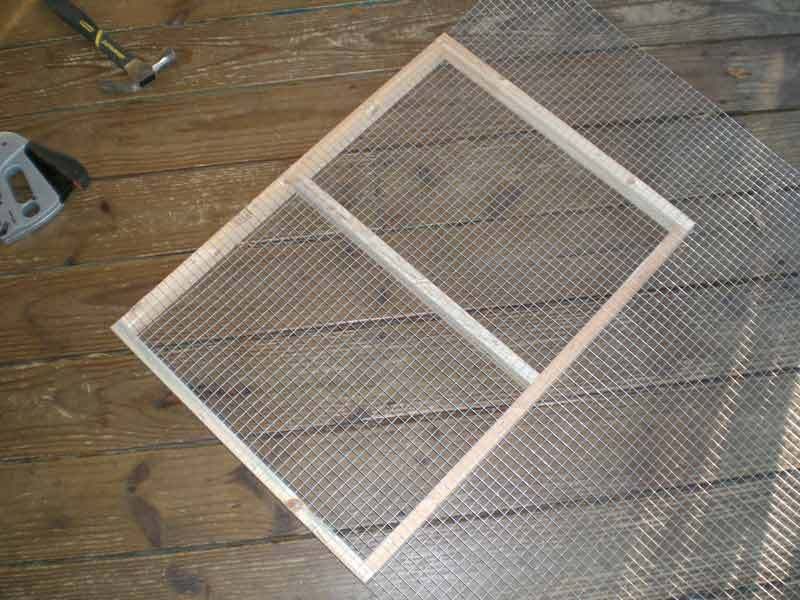
  • Next unroll your Hardware cloth and lay it over the top of the finished frame.
  • align one corner and one edge, using your staple gun and 3/8" staples, shoot staples about every 4 inches all the way around the frame including the center support.
pic10.jpg

 
[*]Next, use your tin snips and trim off the excess hardware cloth.
[/LIST]
pic11.jpg

  • Now that you have finished the first frame completely you get to do it all over again 6 more times!! yay what fun!!
  • After completing all 7 frames it is time to cut the legs to size
  • Cut 4 of the 2x4x8's to 68 inches
pic12.jpg

  • Now lay the legs on the ground or table and mark a line at 8" from the bottom side going up.
  • Then mark a line from there every ten inches working your way to the top...18",28",38"...etc
  • Now mark a line from the bottom side going upward at 5 & 13/16.
  • from that line work your way up again marking a line every 10 inches...15 &13/16",25 &13/16"..etc
  • Using a speed square make a square line across the legs at every mark. It should look something like this...
pic13.jpg

  • Now it is time to attach the frames to the legs.
  • This may sound a bit confusing but is really not to bad.
  • lay out two of the 68" legs parallel with each other and 21" apart with the lines you drew facing up and level with each other. (the bottom of the legs is the side were you drew the first 8" line)
  • Lay the first frame(hardware cloth facing down) on the 8" mark on both legs. The frame will only line up one way, if its not reaching both legs rotate the frame til it does.
  • The frame should sit flush to the outer edges of both legs and there should be a 21" gap between the two legs. (to the inside) I think the pictures do a better job explaining.
  • Remember the hardware cloth is the bottom of the frame. you want to line the top of the frame up with the 8" line you drew
  • Pre-drill glue and screw the frames to the legs
pic14.jpg

  • Continue on to the next frame mounting them to every 10" mark from the original 8" mark. all the while keeping your legs flush to the front and back of each frame.
pic15.jpg

  • Once all frames are attached it is time to attach the slide railing for the tubs. (these are the 1x2x31")
  • Bellow each frame you will see a line. this is were the slide rails attach.
  • Now you must Decide which side of your rack is going to be the front and which side is the back.
  • The slide rails will sit flush to the back legs and stick out 3 inches past the front leg, this allows the tubs to be pulled out about 90% of the way without falling.
  • align the tops of the rails to the line.
  • Pre-drill glue and screw
pic16.jpg


pic17.jpg

  • Once you have completed attaching all 7 frames and slide rails to the first 2 legs lay out the remaining 2 legs in the same fashion as the first two and roll(with help) the rack onto the legs.
  • Line up the frames and rails to the appropriate marks and pre-drill glue and screw em all.
  • Now Stand the rack up, Almost done....
  • As you stand it up you will notice a gap between the frame and the sliding rail.
  • Cut 14, 2"x4"x21"
  • These 21" Gap fillers just keep the tubs from sliding left or right when you are pulling the out or pushing them in.
  • Line them up to the top of each frame and screw them in from the inside of the frame and from the inside of slide railing, looks like this...
pic18.jpg


pic19.jpg


pic20.jpg

 
[*]Now attach the watering system of your choice. I used an automatic watering system
[/LIST]
pic21.jpg

  • Next install your tubs and level it
pic22.jpg

  • I hope this wasnt too confusing. If you have any questions please ask away. I am more than happy to help out anyway I can. If you need help over the phone that runs 3.99 per minute. LOL
pic23.jpg


pic24.jpg
 
I guess I can add that I feed my mice mazzuri but my rats get a mixture of purina dog food, Game Cock, and Black russian Sunflower seeds.....along with occasional fresh fruits! If you put dog food on top of their tub first it will hold all the seed from the game cock and allow it to slowly fall in as they move the dog food. Game Cock is cheap, and very nutritious(about $13.00 for 50lbs).
 
I built one of these a few month back and it works great. One thing I add was a food hopper.
IMG_0764.jpg


This is what it look like in use. It just hold the food in one place.
IMG_0763.jpg


How does your water system work?
 
Nice hopper! I had some cheesy ones I made but ended up not using them. The watering system is absolutely the best investment I made. I had 75 tubs so there is no way I could find the time to fill that many bottles. I actually sold all my racks and downsized to only 3 tubs now.....and I still have a watering system...just a lot easier. The one I had was a 2 gallon bucket with a filler float that would fill the tank automatically when it was low. Ag-select has a good supply of systems and they are fairly cheap. One thing I would recommend to anyone using a watering system is to use water filters. I had 3 on mine and grit and sand would still find its way into the system and clog valves.
 
Back
Top