Jadie.Glitch
:) colubridstudios.com :)
I saw a member post a photo of their snake rack and I REALLY love it. I went into my local lumber house and asked them for a quote on the materials, kind of explained it, and showed him the picture.
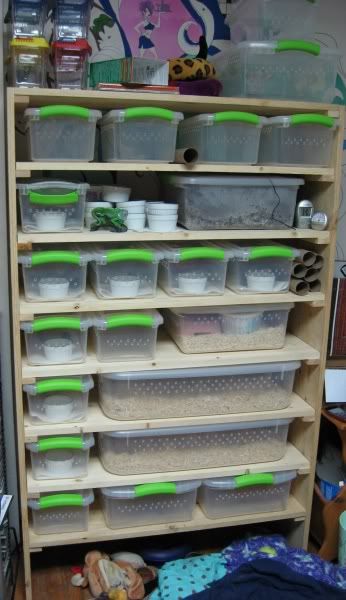
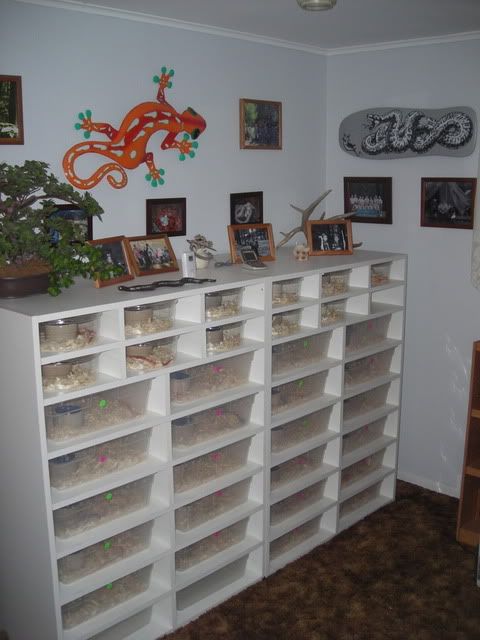
Here's the picture of it, taken from a post by Old_School in a thread in the DIY section:
Basically, it seems like I'm making melamine "bookshelves", right? But instead of books, I will be stuffing containers with snakes in there. Simple enough, right?
Well he (the guy at the lumber house) told me it would need to be done with plywood, not melamine, and that I can't just screw it together. He says there's no way to get some of the divider slats in there without screwing at angles, adding 2x2 support pieces, and glue. Then he quoted me $300 for the raw materials (and this is the quote for PLYWOOD, not melamine like I wanted ).
).
I left there very discouraged with the idea that I'll just have to sell all my snakes and get out of the hobby (I know, a little melodramatic, but yesterday was just a bad one, lol). The randomly-sized glass tanks all over the house are driving me crazy and I NEED a snake rack. When I saw this one I fell in love with it. It looks like a really nice piece of furniture and also seemed simple enough to put together.
I built a rat-rack with the same lumber person's guidance and did just fine, so I'm inclined to trust him... but is it REALLY that difficult??
I need some help and encouragement here. Thank you much
Here's the picture of it, taken from a post by Old_School in a thread in the DIY section:
Basically, it seems like I'm making melamine "bookshelves", right? But instead of books, I will be stuffing containers with snakes in there. Simple enough, right?
Well he (the guy at the lumber house) told me it would need to be done with plywood, not melamine, and that I can't just screw it together. He says there's no way to get some of the divider slats in there without screwing at angles, adding 2x2 support pieces, and glue. Then he quoted me $300 for the raw materials (and this is the quote for PLYWOOD, not melamine like I wanted
). I left there very discouraged with the idea that I'll just have to sell all my snakes and get out of the hobby (I know, a little melodramatic, but yesterday was just a bad one, lol). The randomly-sized glass tanks all over the house are driving me crazy and I NEED a snake rack. When I saw this one I fell in love with it. It looks like a really nice piece of furniture and also seemed simple enough to put together.
I built a rat-rack with the same lumber person's guidance and did just fine, so I'm inclined to trust him... but is it REALLY that difficult??
I need some help and encouragement here. Thank you much