• Hello!

    Either you have not registered on this site yet, or you are registered but have not logged in. In either case, you will not be able to use the full functionality of this site until you have registered, and then logged in after your registration has been approved.

    Registration is FREE, so please register so you can participate instead of remaining a lurker....

    Please be certain that the location field is correctly filled out when you register. All registrations that appear to be bogus will be rejected. Which means that if your location field does NOT match the actual location of your registration IP address, then your registration will be rejected.

    Sorry about the strictness of this requirement, but it is necessary to block spammers and scammers at the door as much as possible.

Markey's Condo..

Markey

New member
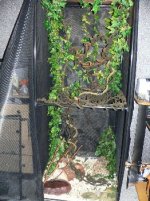
It has four levels. All have different temps and humidity levels which are all within normal limits.
I did add a moist hide during Markey's shed this past week and she loved it! She stayed in there for several days and then went to the third level to shed. It was a beautiful shed!!!!!
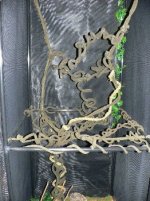
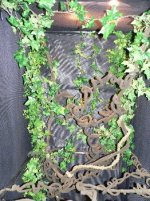
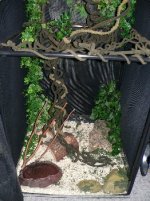
Here are some pictures of the 260 gallon setup. The first one is just to show you what it looked like before we added the greenery!
 

Attachments

  • Markeysvinesbeforeaddinggreenery022007lg.jpg
    Markeysvinesbeforeaddinggreenery022007lg.jpg
    35.2 KB · Views: 171
  • Markeysenclosuretopview022007lg.jpg
    Markeysenclosuretopview022007lg.jpg
    45.5 KB · Views: 170
  • Markeysenclosurebottomview022007lg.jpg
    Markeysenclosurebottomview022007lg.jpg
    36.8 KB · Views: 169
  • Markeysenclosurefullview022007lg.jpg
    Markeysenclosurefullview022007lg.jpg
    40.7 KB · Views: 171
I ended up chatting with a really cool guy from HerpSupplies.com by pure accident (I wrote to the company to ask a question about their backgrounds) and he told me that he had the same exact enclosure. He used a sheet to surround the outer part of the cage and it helped to keep his temps and humidity levels where they needed to be. My husband purchased a king sized black sheet and made one for our enclosure. It worked extremely well! I was very impressed with Eric from HerpSupplies.com because even though he wasn't making a sale from me he still took the time to guide me through the process of making this device for the enclosure. It really helped to make this enclosure work for us. I will no doubt keep that website under my favorites because the way he helped me was a true definition of EXCELLENT customer service in my opinion.
I don't know if you can even tell there is a black sheet surrounding the enclosure but there is. It's attached with a snap kit from Walmart.
 
wow, that is some enclosure!
lucky snake!

Did you build it yourself? How did you go about heating each "level"?
 
Yes, my husband and me built it ourselves. It was a lot of twisting and zip ties!!!!!!! LOL
I have two uth mats running on the main level. I run a night light during the evening hours as well. During the day I have two overhead lamps running. All my temps are in normal limits but each level varies....like my first level stays at 82/83 on the substrate outside of the hide and 85 inside the hide. The second level stays at 74/75 on the cool side and 76/77 on the warm side. My third level stays at 83/84 on the warm side and my fourth level goes up to 87/88 degrees on the warm side. I've checked temps regularly for a while now and everything stays + or - 1-2 degrees. I'm very happy thus far but have since switched out the Aspen. I was not happy with it. I prefer my Repti Bark out of everything I've used. It holds moisture well and it doesn't stick to everything. Markey loves burrowing in the Aspen on the cool side so I did leave a nice thick layer of that for her to have her fun in!
 
Markey said:
Yes, my husband and me built it ourselves. It was a lot of twisting and zip ties!!!!!!! LOL
I have two uth mats running on the main level. I run a night light during the evening hours as well. During the day I have two overhead lamps running. All my temps are in normal limits but each level varies....like my first level stays at 82/83 on the substrate outside of the hide and 85 inside the hide. The second level stays at 74/75 on the cool side and 76/77 on the warm side. My third level stays at 83/84 on the warm side and my fourth level goes up to 87/88 degrees on the warm side. I've checked temps regularly for a while now and everything stays + or - 1-2 degrees. I'm very happy thus far but have since switched out the Aspen. I was not happy with it. I prefer my Repti Bark out of everything I've used. It holds moisture well and it doesn't stick to everything. Markey loves burrowing in the Aspen on the cool side so I did leave a nice thick layer of that for her to have her fun in!

is it made out of plastic piping? what did you use for the walls? How did you escape-proof it?

My snake is still quite small, but I plan to move her out of her 20g to her own "condo" when she hits adult size. It's a project that has been on my mind for some time, and I've been considering different options for building it.
 
Oh noooooo I'm sorry, I misunderstood you. We purchased the enclosure. It's called a Reptarium. It's the 260 long setup....they come in several different sizes. I wanted this for the height. We were building a new room for our son and wanted a tall enclosure to cover a door. Once the room was finished we realize the door added depth to the room which was already quite large.....but we loved the thought of the new setup so we of course put it up! It is made out of pvc pipes and has a mesh covering. There is also a softray liner underneath. I had a custom piece of glass made to go under the mesh cage so the uth mats could easily attach without the possibility of burning the mesh. I didn't want to chance it.....the glass works great! I had the edges beveled so it would be safe. The mesh zippers. You can put a small lock on it but I never have. The snake cannot get out.
In Canada the Reptariums are sold under a different name but I cannot think of it off hand. They look the same though.
 
Wow! I remember seeing some other pics from a different thread a while back, and I was EXTREMELY impressed with it!!

Just a couple of quick questions... Does Markey make use of the various levels on a regular basis? Where did you purchase all of the greenery, and for approximately how much? Everywhere I go it's WAY too expensive (except Dollarama of course, which is awesome :grin01: ).

Thanks,
Lisa
 
Hi, Lisa. I added two more levels since the first pictures. That's why I posted the new ones. :0)

Yes, Markey regularly uses three of the four levels. I've never seen her on the fourth level. She went to the third level yesterday and had an amazing shed. I was totally impressed with it! I was also thrilled that she had a complete shed.....yipppeeeee!!

As for the greenery, I purchased it from Dr.Fosters and Smith I believe. It was very expensive but not as expensive as purchasing it in the local pet shops. I got about thirty vines I believe and all of my greenery for about $300.00. I went back and purchased more greenery from Hobby Lobby and that was another $70 but I like it better because it hangs well and it comes in longer sections. PetCo actually told me to go there....lol When I saw how much greenery I got versus what a little package cost at PetCo, I was very pleased that they sent me there. LOL They told me that's where THEY buy their decorative vines from.
 
I believe that here in Canada, Exo-Terra makes a product that is exactly the same. It's called "Flexariums" and comes in multiple sizes including 22, 38, 65, 100, 175, and 260 gallons. On average, the pricing is as follows:

22 gallon: $39.99
38 gallon: $49.99
65 gallon: $64.99
100 gallon: $89.99
175 gallon: $99.99
260 gallon: $119.99

Now, keep in mind that the above prices are just approximate. Various buisnesses that carry this line of Exo-Terra products may price it higher, lower, have discounts/sales, etc.

Below is a link to a page on the official Exo-Terra website that contains all the needed information regarding Flexariums.
http://www.exo-terra.com/EN/products/flexarium_i.html

I hope this served to be of some help. :)

Lisa
 
Markey said:
Hi, Lisa. I added two more levels since the first pictures. That's why I posted the new ones. :0)

Yes, Markey regularly uses three of the four levels. I've never seen her on the fourth level. She went to the third level yesterday and had an amazing shed. I was totally impressed with it! I was also thrilled that she had a complete shed.....yipppeeeee!!

As for the greenery, I purchased it from Dr.Fosters and Smith I believe. It was very expensive but not as expensive as purchasing it in the local pet shops. I got about thirty vines I believe and all of my greenery for about $300.00. I went back and purchased more greenery from Hobby Lobby and that was another $70 but I like it better because it hangs well and it comes in longer sections. PetCo actually told me to go there....lol When I saw how much greenery I got versus what a little package cost at PetCo, I was very pleased that they sent me there. LOL They told me that's where THEY buy their decorative vines from.

That's good to know... Thanks.

One more little question (sorry :rolleyes: ). On average, what was the price per vine, and what is the length?

Once again, thanks.

Lisa
 
Silt said:
I believe that here in Canada, Exo-Terra makes a product that is exactly the same. It's called "Flexariums" and comes in multiple sizes including 22, 38, 65, 100, 175, and 260 gallons. On average, the pricing is as follows:

22 gallon: $39.99
38 gallon: $49.99
65 gallon: $64.99
100 gallon: $89.99
175 gallon: $99.99
260 gallon: $119.99

Now, keep in mind that the above prices are just approximate. Various buisnesses that carry this line of Exo-Terra products may price it higher, lower, have discounts/sales, etc.

Below is a link to a page on the official Exo-Terra website that contains all the needed information regarding Flexariums.
http://www.exo-terra.com/EN/products/flexarium_i.html

I hope this served to be of some help. :)

Lisa


thanks for all the info guys-

part of the fun for me will be building it, though-
but this gives me a lot more ideas.... using mesh instead of glass or wood might be a lot cheaper- and I could maybe sick mesh on a wood frame or instead of a viewing screen. Look awesome, anyways!

I love DIY projects. too bad i'm living in a little box apartment right now. I think my remedy for snake addiction will be to elaborate on my snakes enclosure, rather than buying more snakes....

At that rate, she'll probably end up with her own room. :p
 
To be honest, I didn't pay much attention to the cost....I just knew that I needed a ton of them. I actually had about ten or so left over and that's what I used for the third and fourth levels this time.
I didn't purchase them based on length.....it was more of a small, medium, large type thing. My friend told me that he used the larger vines for the bottom area where the snake first climbs up. He said he used the medium and smaller vines (twisting them around each other) so the snake could grip them well. It works bettter when you have two twisted around each other. I followed what he did because it worked for him. On the end all I had left were some large vines so I twisted them around each other and they worked fine, too.....I do like the look of the different sizes twisted around each other though. Also, I made a few basket type areas for Markey just to hang out on. I made them to fit her when she's coiled. She will go to those baskets and hang out for an entire day sometimes. I love it!!
I find that the more room you give your snake to explore, the more they explore. If your snake has never had the opportunity to climb, you might have to put him in the vines a few times but eventually, he'll get around on his own.
Markey went right to exploring the upper levels after I added them. She is very curious. Her favorite place to hang out is on the cool side burrowed under the Aspen and that's why I left a deep patch of it in the enclosure. She's spoiled but she's so worth it. She is the best little snake EVER!!!!
 
Yes, thank you Lisa. That's what it's called. The Flexarium is what is available in the US. I picked mine up for around $120 I believe. Then I had to add another $30 or so for the Soft Tray liner (keeps all of the substrate in).
The black sheet that we used for the cover ran about $30 I believe. The snap kit was a couple of dollars.
It's definitely expensive to do an enclosure like this but it's well worth it in my opinion. There are various sizes available so you could always downsize a bit.....it's really about personal style and what will fit in the space you have.
I wanted this to be a focal point in my son's new room. It looks amazing against the metallic theme/colors he has (charcoal gray walls that reflect the light, silver blinds, pewter track lighting and ceiling fan)......it screams boy!!!! LOL
 
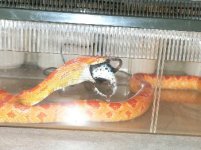
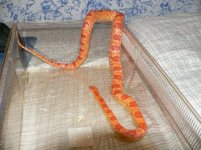
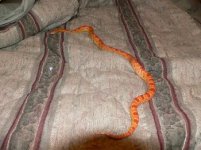
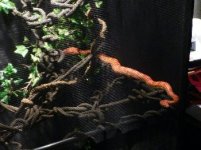
Here are some pictures of Markey.....
 

Attachments

  • Markeyeating09-05lg.jpg
    Markeyeating09-05lg.jpg
    27.5 KB · Views: 52
  • Markeyafterameall0905lg.jpg
    Markeyafterameall0905lg.jpg
    31.5 KB · Views: 52
  • Markeyrearview09-05lg.jpg
    Markeyrearview09-05lg.jpg
    29 KB · Views: 52
  • Markeycheckingoutthe260setup022007lg.jpg
    Markeycheckingoutthe260setup022007lg.jpg
    27.7 KB · Views: 52
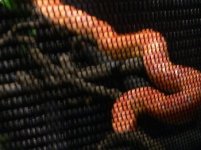
  • Markeythroughmesh022007lg.jpg
    Markeythroughmesh022007lg.jpg
    23.2 KB · Views: 53
IT looks great!!!
but I would probably waste something like this on a bunch of anoles and other small lizards with live plants in the setup. :grin01:

I am actually looking for something like this in the future so I can keep those guys outside during the summer while I sit and watch them on my patio.
 
I know of some people who have these on screened in porches, etc....in more humid climates. They really love it!
I wanted it because it was to be a focal point for the new room and it was to cover a door leading out of the room. Once the room was completed we were quite happy with the way the door looked but we loved the idea of giving Markey more climbing space. She really uses the different levels so we are happy with the choice we made.
Thanks everyone for looking at the pictures!!!
 
I love the cage, and envy Markey beyone belief.

Now how do I make a rack of home made cages out of pvc...???

I have the horrible problem of already having been sucked in at 14, so i'm going to have a huge number of snakes by hte time I'm in m y own house, and I also want ALL my snakes to have room to climb and move around. How do I possibly do that without spending more than say..., two arms and two legs.

This may just have solved my problem. If I figure it out this summer I'll post some instructions and pics of the new space consuming "racks."
 
tb, my mesh cage was purchased. I don't know if you read through all of the posts, but it's called a Reptarium. They are sold throughout the US. In Canada they are sold as Flexariums. They come in all different sizes so you could definitely downsize a bit and pay much less. There is a website. Just type in Flexarium.com and it will take you to the right place.
I'd love to see your setup if you decide to do it on your own......when you say "racks", just how many snakes do you plan to house now? You don't need racks if you only have one. Have fun with it and be sure to post pictures.
 
Yes, I know that yours are purchased, but that design won't do for my house now, at least.

Sorry, I was not thourough explaining what I plan to do.

Hopefully I will be housing 20+ snakes in 5 years or so, until then 7 or 8 is most likely (but we all know that I won't stop there!!). I want to provide these guys with lots of room in there cages, but not pay an arm and a leg for the caging. I want to make a set of "racks" that are more like stacked visionariums, if you've seen them. Most of the sides of the cages will be solid, but I do need some ventalation, so I think I'll make the small sides out of mesh. The front will hopefully be some sort of glass or clear plastic, to allow viewing, or I guess it could be the mesh side. The frame for the cages will be made out of pvc and the solid sides will be slipped inside a slice in the pvc, or we'll find another easy way to attach them.


I guess I could use the ones your using, but I'd have to cover most of the cages in cloth to make sure the cages don't dry out too much. That's why I thought it would be more fun to build in some solid sides.

No idea if this'll work, but it'll be cool if it does!!
 
Back
Top