• Hello!

    Either you have not registered on this site yet, or you are registered but have not logged in. In either case, you will not be able to use the full functionality of this site until you have registered, and then logged in after your registration has been approved.

    Registration is FREE, so please register so you can participate instead of remaining a lurker....

    Please be certain that the location field is correctly filled out when you register. All registrations that appear to be bogus will be rejected. Which means that if your location field does NOT match the actual location of your registration IP address, then your registration will be rejected.

    Sorry about the strictness of this requirement, but it is necessary to block spammers and scammers at the door as much as possible.

Recent Enclosure Build

rosewood

Dedicated Reptile Lover
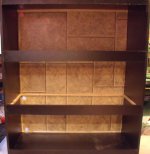
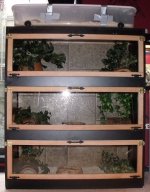
So after finally settling on a design my boyfriend, Marcus, and I finished up this beauty a couple months ago. It is housing Sunny in the top enclosure, Prince in the middle, Marmalade on the bottom, and then we have Crackerjack on top.
We made it out of black melamine sheets for the sides, top, and bottom. For the back we used a thin sheet of ply and covered it with vinyl flooring for a nicer look then drilled holes for the cords and ventilation in the back.
To cover up the holes for the cords I used some left over pieces of acrylic cut about 3" X 2" and glued on pieces of the vinyl flooring cut to the same size. Then I drilled holes on either end and using very small screws I screwed them into place. You cant even notice that they are there.
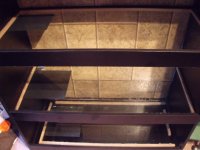
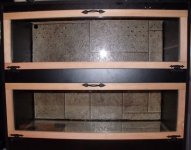
Each enclosure has a 6mm tempered glass bottom so that I could still use my exo terra heat mats. The doors are just a simple wooden frame with an acrylic viewing window. I chose acrylic because it was cheaper than glass by about $10 per sheet and WAY easier to work with. Drilled it all it with a simple battery powered hand drill.
 

Attachments

  • snake enclosure 006.JPG
    snake enclosure 006.JPG
    66.1 KB · Views: 395
  • enclosure2 002.JPG
    enclosure2 002.JPG
    86.2 KB · Views: 394
  • enclosure3doors 002.JPG
    enclosure3doors 002.JPG
    70.1 KB · Views: 394
  • snakeenclosure4 001.JPG
    snakeenclosure4 001.JPG
    87.7 KB · Views: 394
Haha thanks! I built it to match the rest of the furniture in the room which is black with oak tops and nobs. I was originally going to use oak for the frame on the doors but decided to go with a smoother wood so I wouldnt have to do any sanding.
I am currently drawing up plans for another similar.
 
That is beautiful! Do you mind sharing roughly how much the entire build ran you in materials?
 
Is that glass you have for the bottoms?
It looks really nice, specially like the solid framing.
 
It is glass I used on the bottoms, 6mm, the same thickness used on the bottom of 40 gal tanks.

The whole thing cost me around $500 it would have been roughly $120 less if I hadnt gone with glass bottoms but I liked the idea of having a longer lasting bottom than melamine so in the long run it will probably save me money and it can be 100% sanitized :)
 
yeah, when money isn't a huge deal the glass would have been the best option, and you then were able to use UTH on the glass I see. Did you caulk around the edge though?
 
I used silicon to seal up the edges between the glass and the melamine, yes. And it was very handy being able to use the UTH's I already had so I saved a little money that way too :p
 
Oh did you mean silicon around the edge of the UTH's or......?

Could have probably done the bottom one better, the way it is now if that UTH ever failed I would have to flip the unit over and take the bottom right off then carefully use a razor blade to get rid of the silicon, replace the UTH then silicon it back in. Safe to say, a hassle and a half lol. Probably would take a couple hours at least and then I would have to let it dry for a day or two before I put the snake back in. But hey I already have plans drawn up for another unit and have learned lots from this one :D
 
Silicon, caulking same thing lol. What I would have done for the bottom shelf would have been to have it like the others with the blocks to keep it up, then just silicon the top edges of the glass. If you were to have a bottom that's fine but then why not just take a razer blade, cut the shelf out and replace it that way?
 
I think it's beautiful even if there were a few things that you'd do differently next time. The two tone look is very classy and I think I'm going to have to steal your idea. :) I'm not very handy though, so I'll probably cheat and start with a a premade bookcase from IKEA and just build from there.
 
The wood it is resting on has a bead of silicon between it and the glass and it is also screwed into the bottom. If I had been thinking I would have just siliconed the edge but alas I was not :p
 
Back
Top