martin-bernstein
Anything Lava!
I had a request in a different thread for a little tutorial for making a white box. Here is my home made white box aka light box.
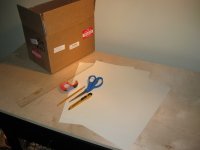
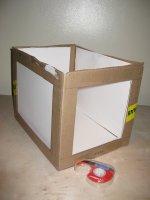
Pic 1. Materials needed: Cardboard box, sissors, tape, pencil, paper knife, white paper (any type will do as long is lets light through)
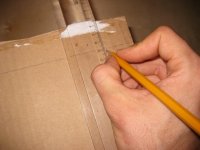
Pic 2. First sketch up where you want to carve out pieces of the card board. You want to end up with just a simple frame so leave 1-2 inches and cut the rest out. (I have European rulers hence the centimeter ruler in the pic)
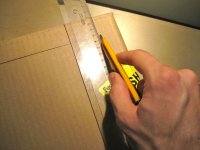
Pic 3. Next just cut the piece out. To get as straight a line as possible use the ruler to stabilize the blade.
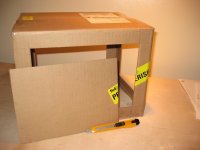
Pic 4. Repeat this until you have three sides with open space.
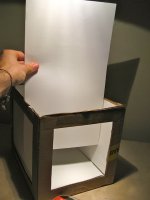
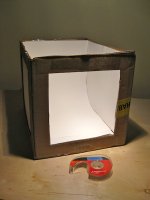
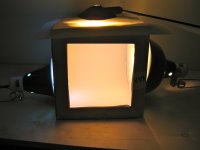
Pic 5. Cut the top of the box off. Tape your pieces of paper to the insides of the box on two opposite. Leave one side open- this will be your camera window. You can also put white paper on the opposite side to the camera window, but this is not necessary. Try to cut the paper so that each sheet covers the entire side of the box. The more white, the brighter your photos.
Cont'd on next post....
Pic 1. Materials needed: Cardboard box, sissors, tape, pencil, paper knife, white paper (any type will do as long is lets light through)
Pic 2. First sketch up where you want to carve out pieces of the card board. You want to end up with just a simple frame so leave 1-2 inches and cut the rest out. (I have European rulers hence the centimeter ruler in the pic)
Pic 3. Next just cut the piece out. To get as straight a line as possible use the ruler to stabilize the blade.
Pic 4. Repeat this until you have three sides with open space.
Pic 5. Cut the top of the box off. Tape your pieces of paper to the insides of the box on two opposite. Leave one side open- this will be your camera window. You can also put white paper on the opposite side to the camera window, but this is not necessary. Try to cut the paper so that each sheet covers the entire side of the box. The more white, the brighter your photos.
Cont'd on next post....