Marica
New member
Please bare with me, this is my first DIY build guide. I really enjoy designing and building stuff for my animals and put a fair bit of research into this project. I’ve included links wherever I thought more information would be helpful. If you have any questions or comments I'd love to hear them.
First off, a big thanks to my dad for helping me build these cages and for lending his tools. And to Greg West of Cornel’s World for wiring the Flexwatt and his advice on its installation.
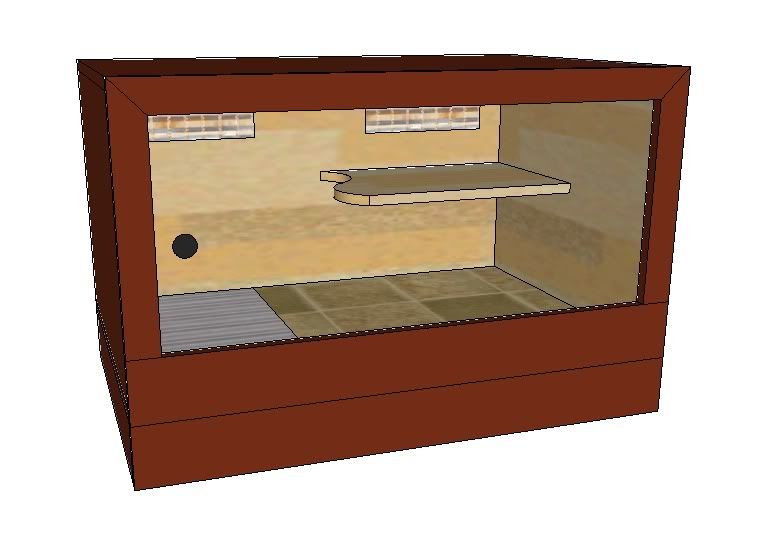
I based this build mostly off of this design/guide. Below is a sketch I created using Google SketchUp showing 1 cage and a pedestal. I decided to make a pedestal as I didn't want the cage directly on the floor, nor did I want to have to crouch down too far to reach into the bottom cage.
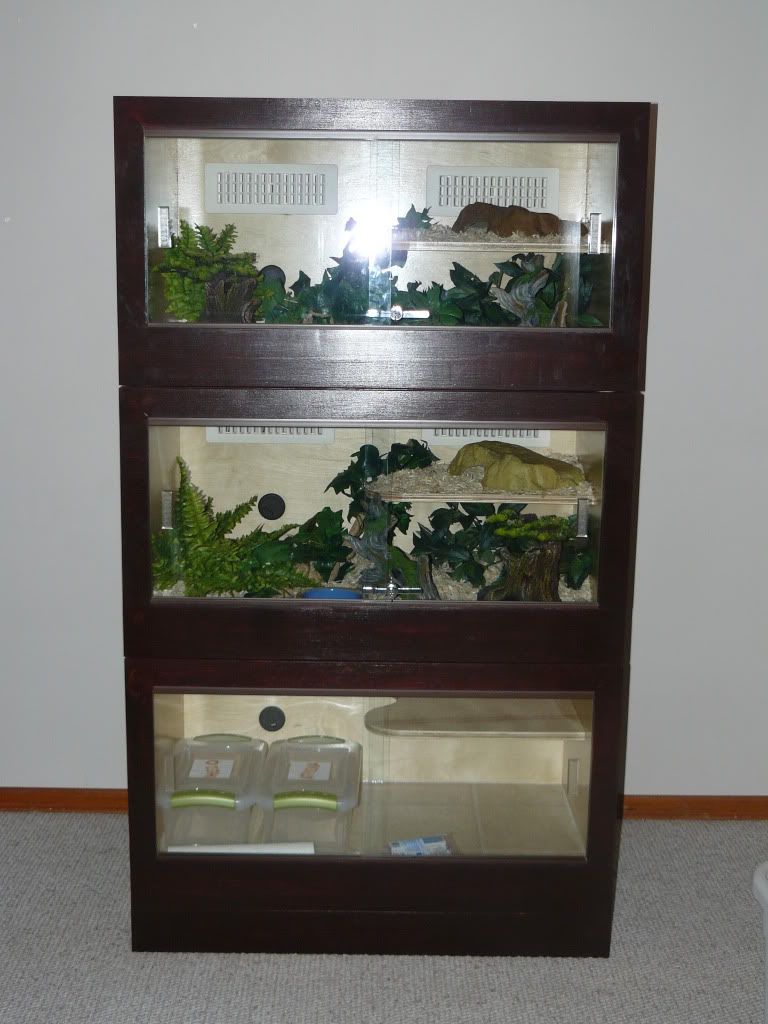
We built 3 cages, each approximately 3' wide x 2' deep x 1.5' high. We were able to get 3 cages and a pedestal out of 3, 4'x8' 3/4" birch sheets. You could also use oak or maple depending on the grain pattern you prefer but birch is generally the cheapest. An even cheaper option is of course melamine. These cages will house my adult Corn Snakes and I plan on building 6'x2' versions that I can stack with these when my Dumeril's Boas require larger accommodations.
Single Cage Cut List:
2 x 36"x24" - Top & Bottom
2 x 24"x18" - Sides
1 x 18"x34.5" - Back
1 x 4"x36" - Bottom Trim/Litter Dam
1 x 2"x37" - Top Trim
2 x 2"x16.5" - Side Trim
When doing our initial cuts we left the side and top trim pieces an inch longer so that we could get the angle cuts aligned perfectly later on. Though you could always adjust the length of the sides or the top and square them off. You could also get fancy and look into moulding trims to make it more ornate.
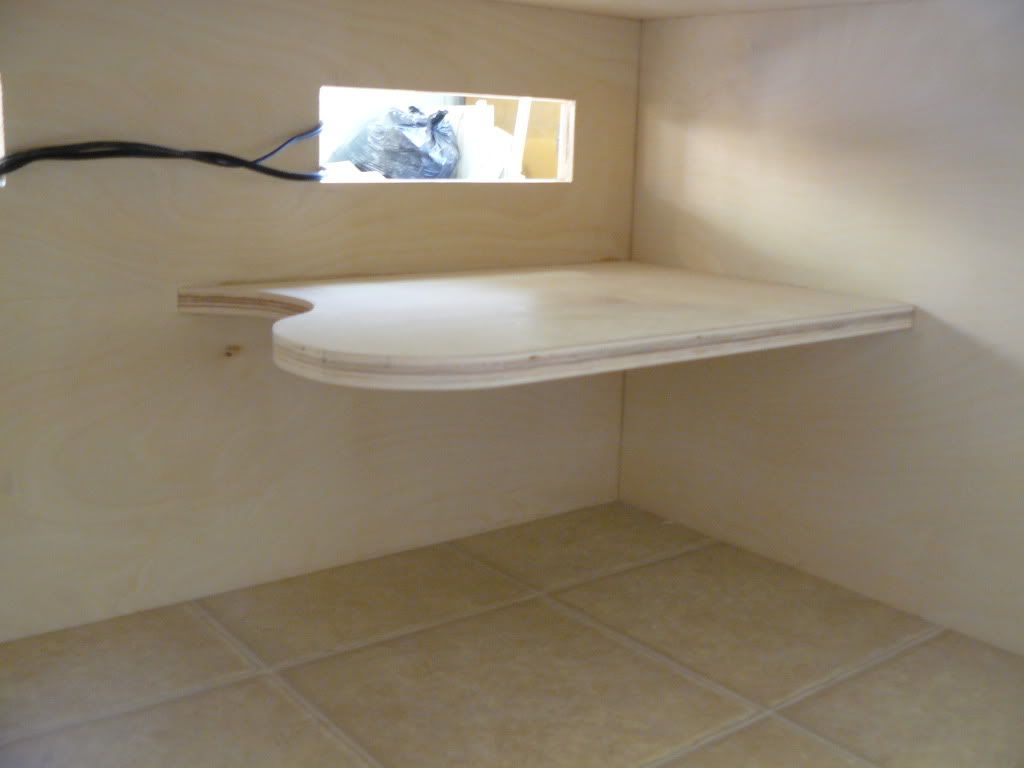
There should be some leftover for a ledge piece which you can cut to whatever shape you prefer. I made sure mine where large enough to contain a large Exo Terra hide.
Pedestal Cut List:
1 x 4"x36" - Front
1 x 4"x34.5" - Back
2 x 4"x24" – Sides
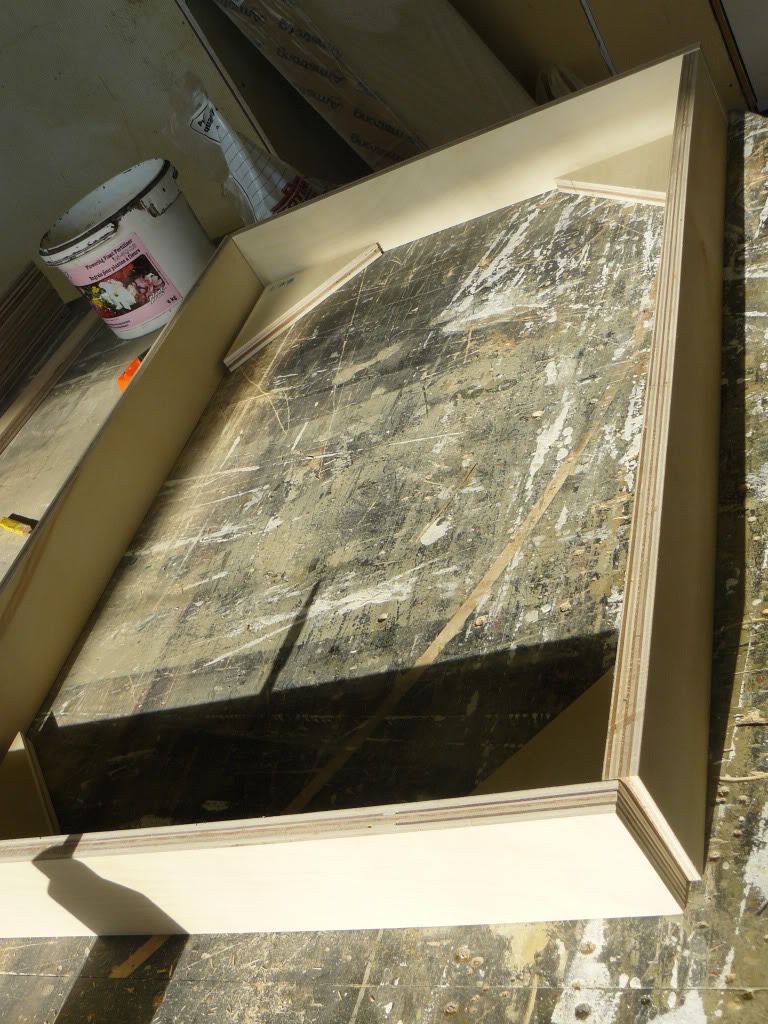
To keep our pedestal frame from shifting around we cut 4 small triangular pieces out of leftover for corner supports (shown below).
Material List:
- Wood Screws (150 box, size 8, 1.5")
- Wood Screws (3-4, 3” for attaching the ledge)
- Wood Glue (optional)
- Drill and 1/8" Drill Bit
- Screw Caps, Wood Filler (optional)
- Vents (personal preference as to quantity and style)
- Adjustable Desk Grommet (for thermometer/stat probe access)
* Equipment (jigsaw, hole saw) to cut openings for vents and grommets
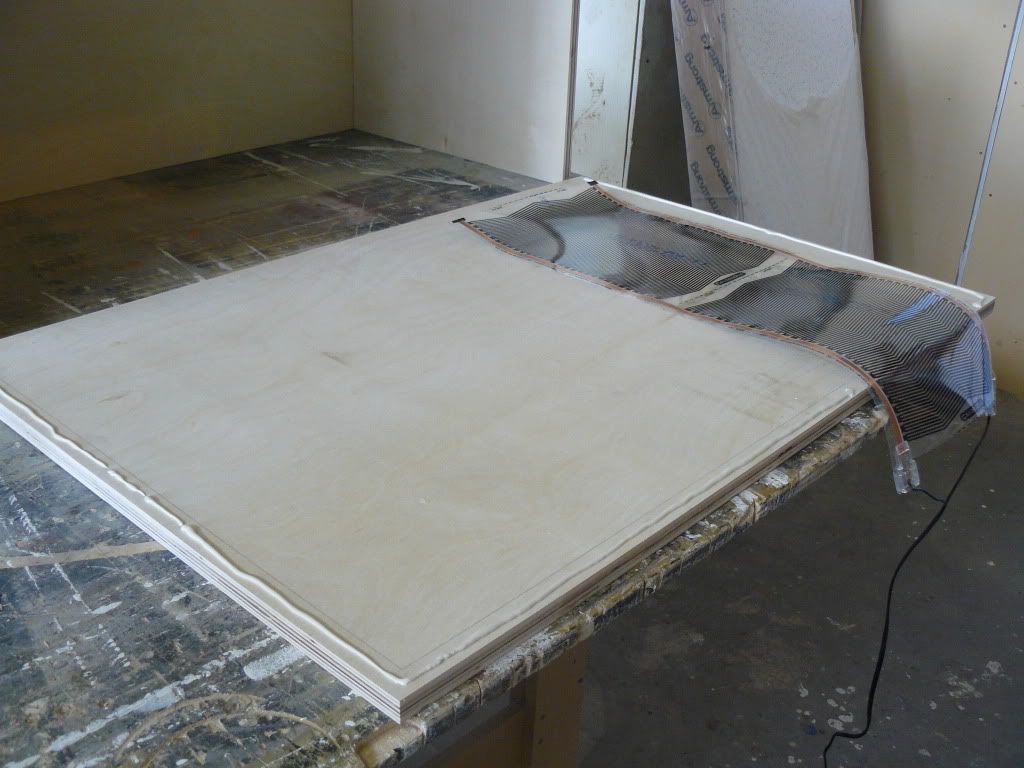
- 11"x24" Flexwatt (product info)
- Linoleum & Adhesive
* Check with a floorcovering company if they have leftover or samples for cheap
- Sandpaper/Sanding Block
- Stain or Primer & Paint for the outside of the cage (optional)
- Water-Based Varathane
- Cloths/Brushes to apply finishes
- Silicone
- Glass (2 x 13"x16-3/4" - the glass needs to be approximately 1/2" less the height of the opening to allow it to fit into the track, the overlap is personal preference though I would suggest at least 1.5")
* Ask at a glass shop if they have any leftover pieces they'd be willing to give you a deal on
- Glass Track, Plastic or Metal (I prefer plastic)
* The glass shop should carry it and some hardware stores as well
- Glass Door Locks
- Stick-On Finger Pulls
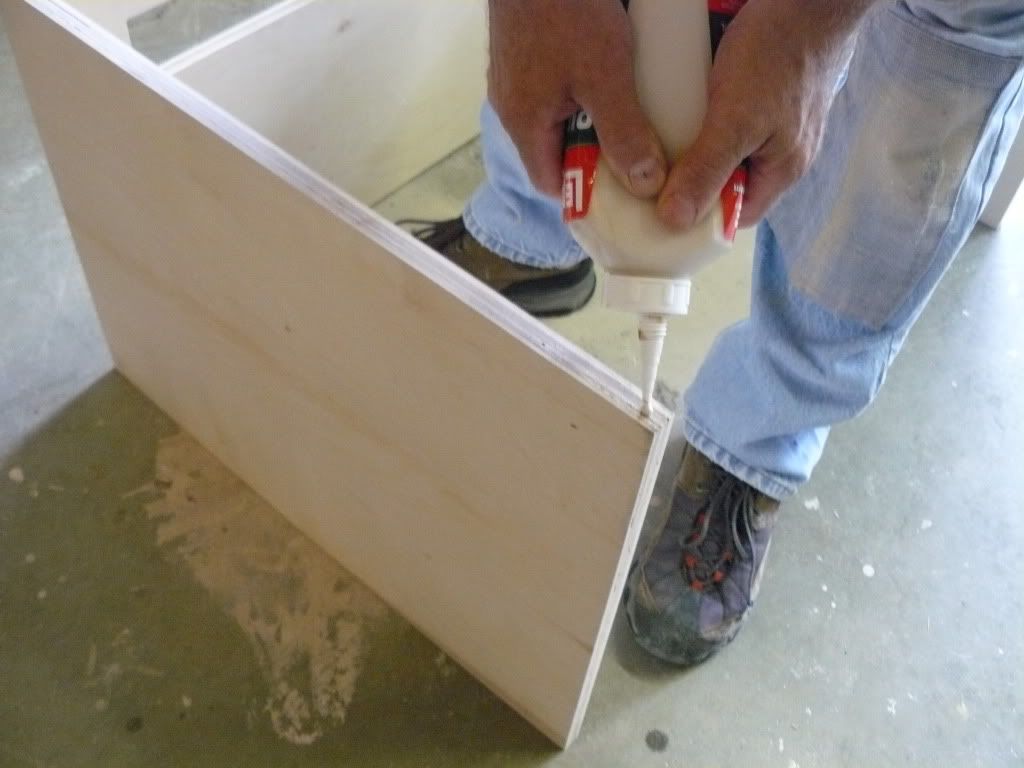
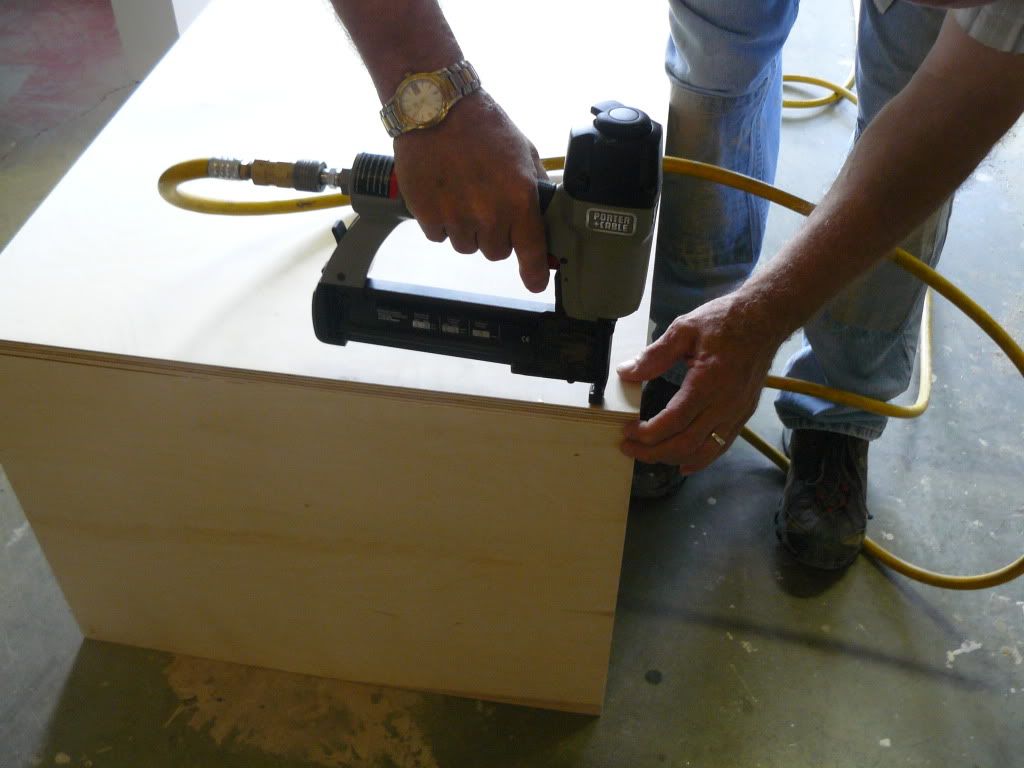
Since my dad has an air compressor we opted to use his nail gun as opposed to screws. If you are using screws you will want to drill pilot holes for them. I have used the term 'attach' in the assembly descriptions below as some may prefer to use nails, others screws.
I had a difficult time finding circular vents so I picked up some rectangular floor registers. If you are concerned with the size of the slits in the vents you could purchase some screen mesh to surround them and tuck through the back.
Pedestal Assembly:
Attach the side pieces behind the front piece and the back inside the side pieces. I chose this method of placement with the cages as well so that the front would not show any edge grain. Next place the 4 corners inside the frame and attach.
Cage Assembly:
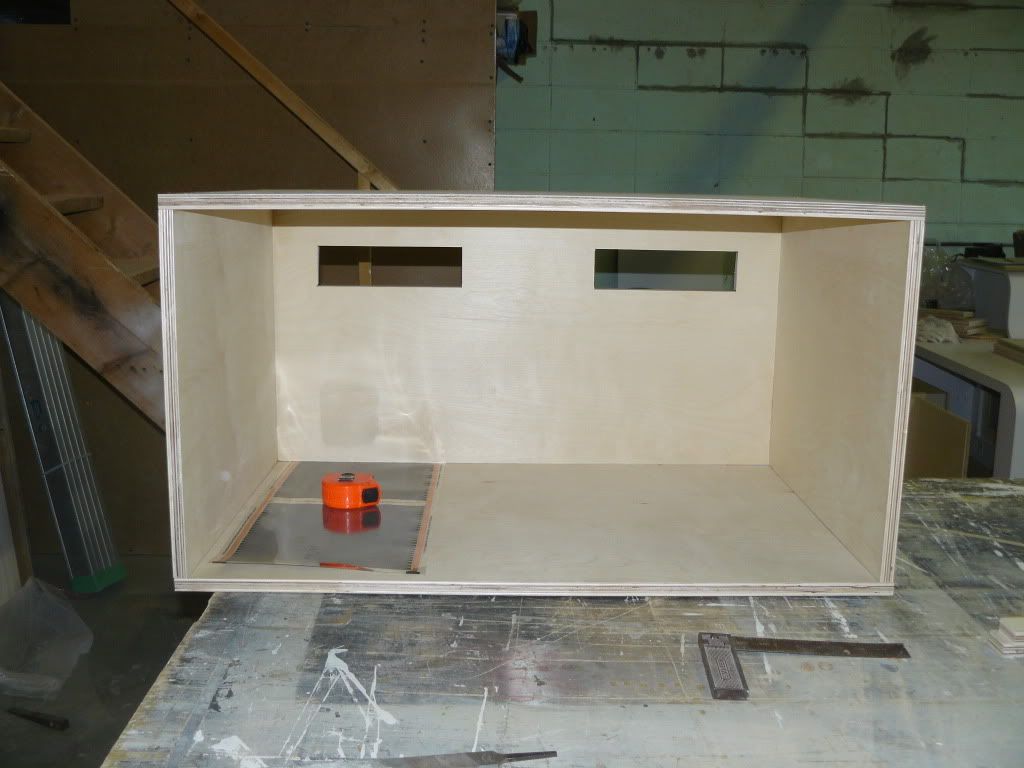
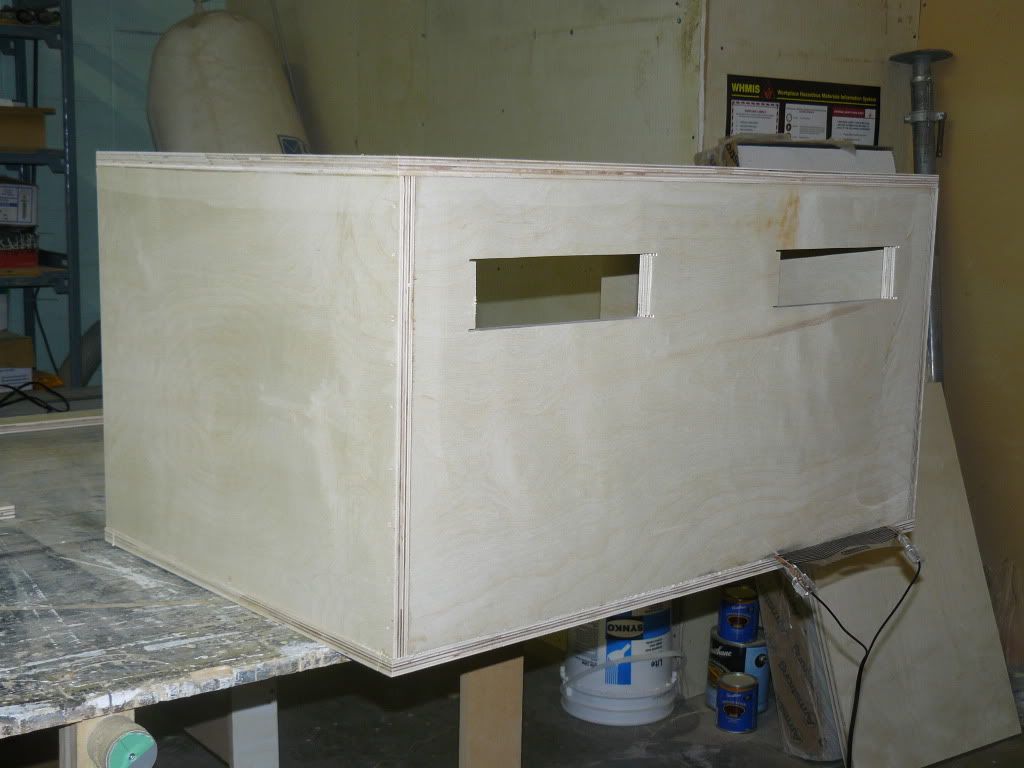
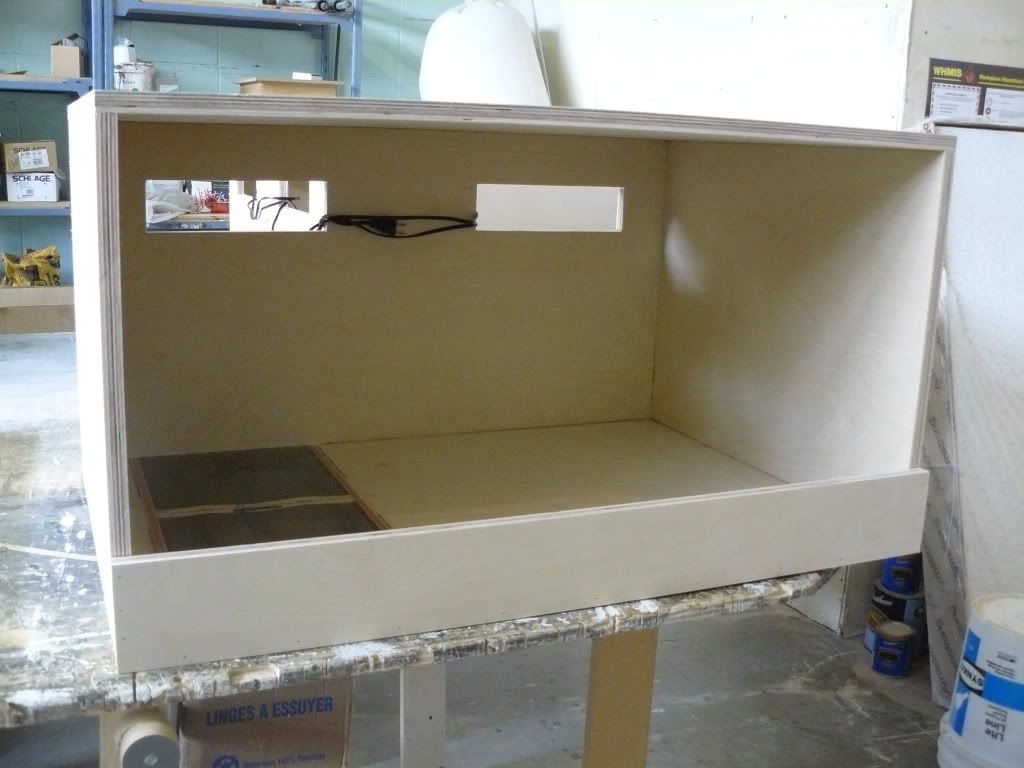
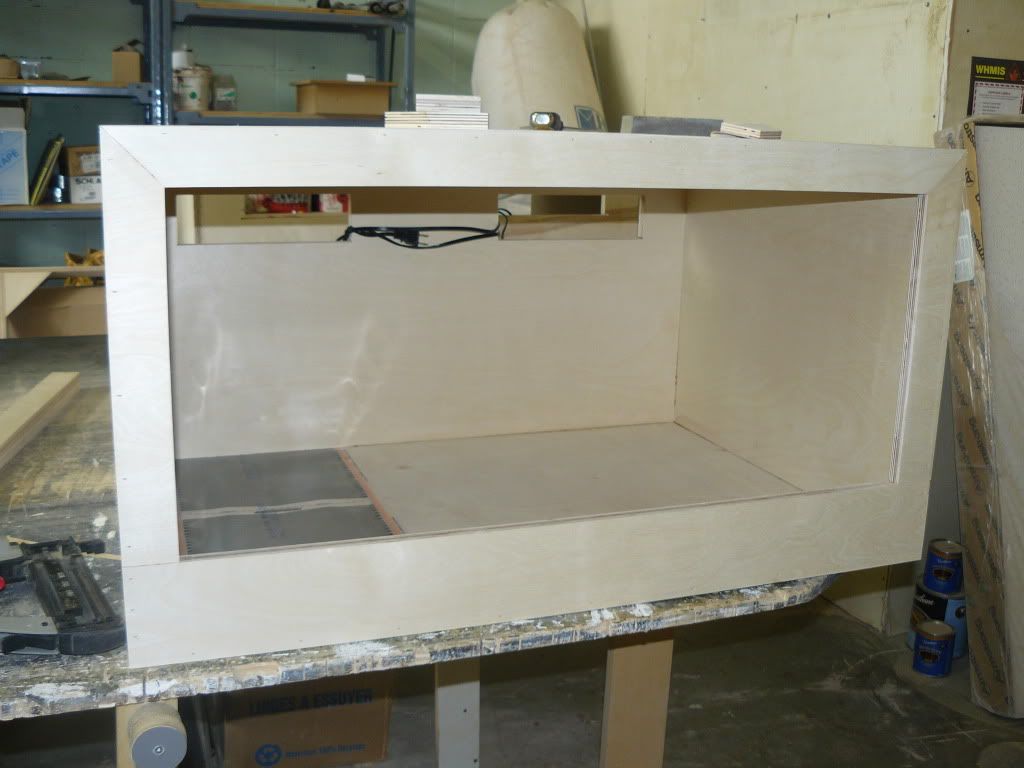
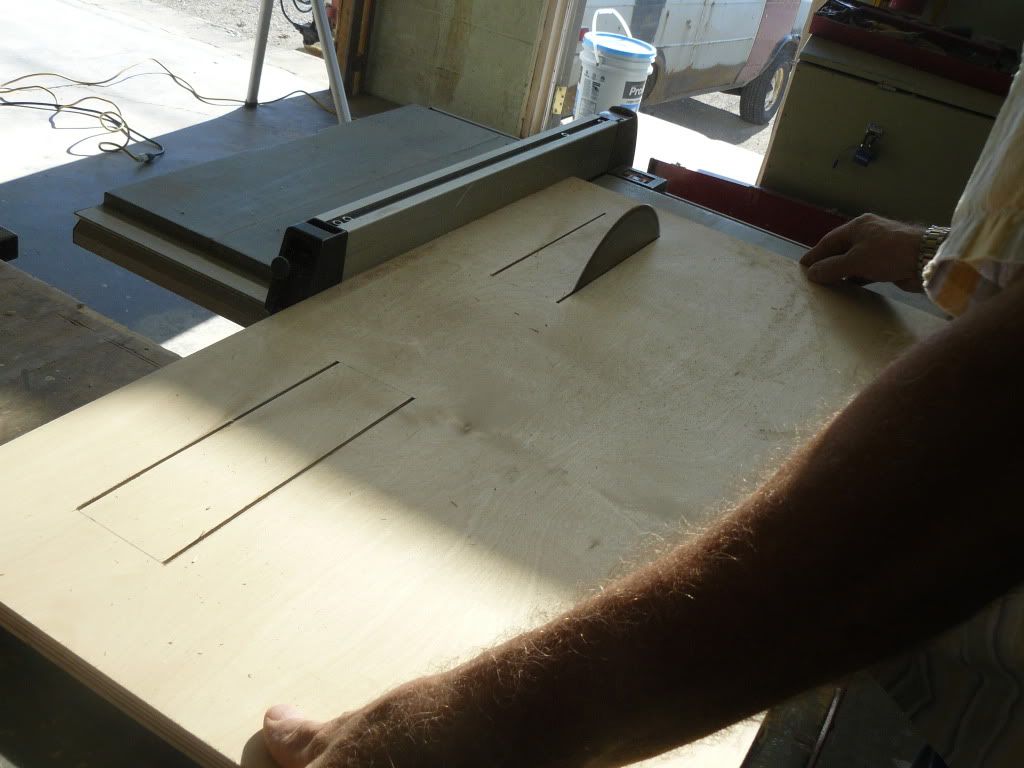
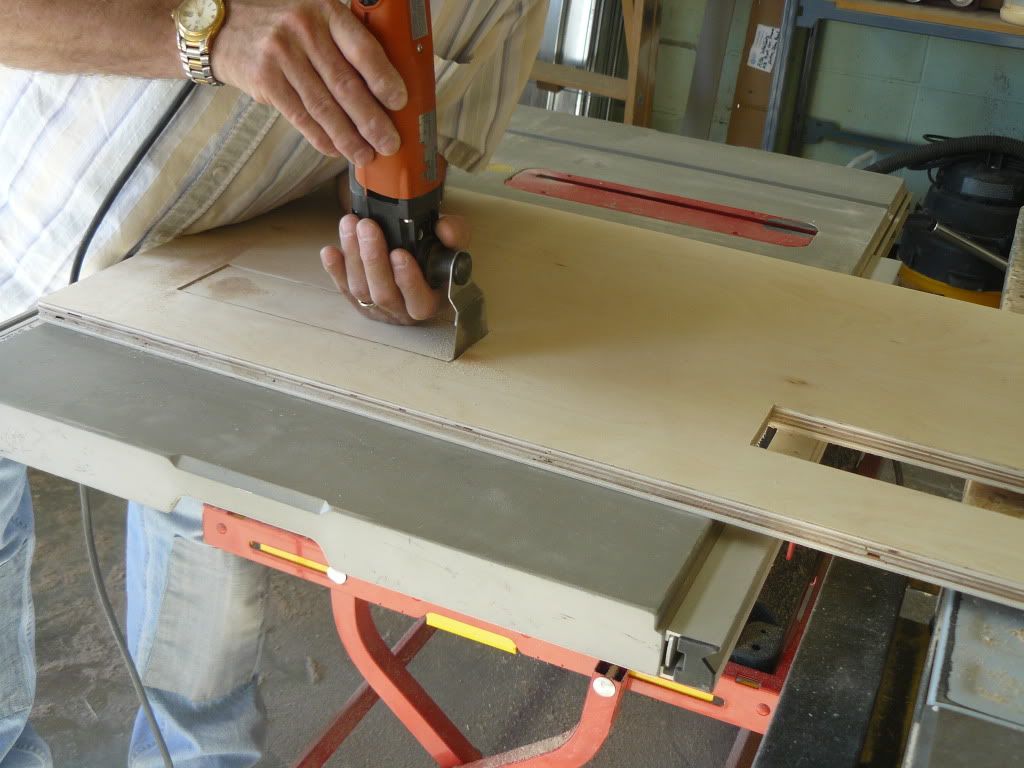
Cut openings in the back piece or side pieces for the vents. We cut the opening for the grommet near the end of assembly and centered it above the heat tape, though you could get it done at this point. As we plan on eventually making more cages and stacking them side-by-side we placed our vents and grommet in the back, however if you prefer they can be placed on opposite sides of the cage.
Attach the sides to the back piece.
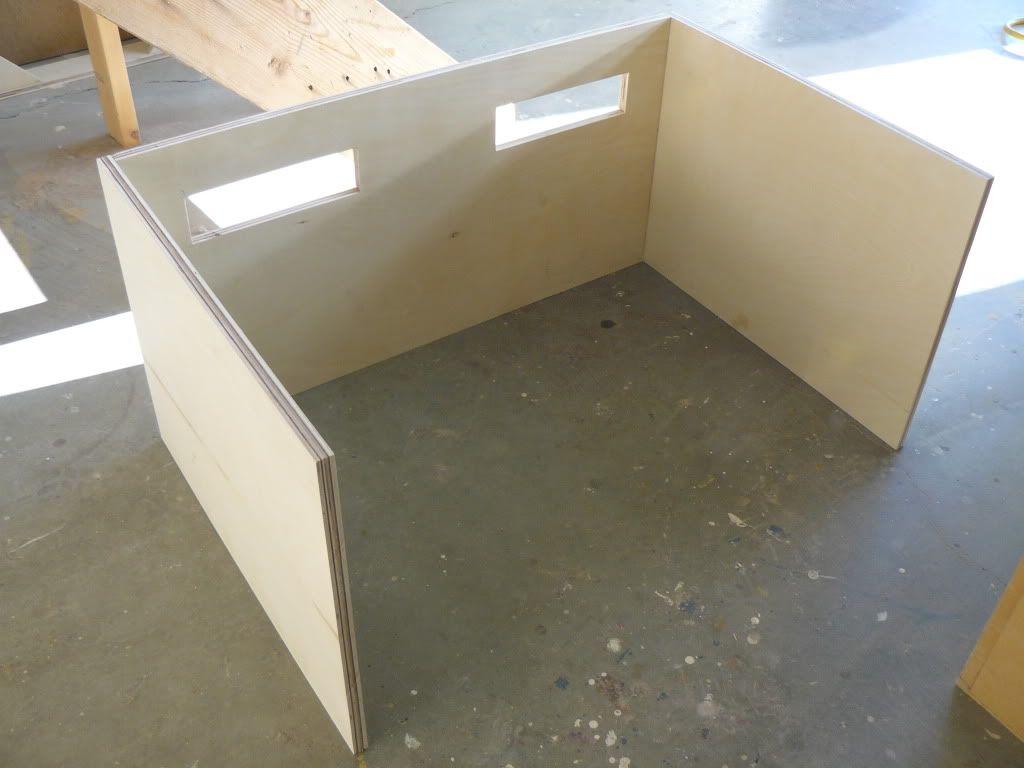
Then attach the top piece.
First off, a big thanks to my dad for helping me build these cages and for lending his tools. And to Greg West of Cornel’s World for wiring the Flexwatt and his advice on its installation.
I based this build mostly off of this design/guide. Below is a sketch I created using Google SketchUp showing 1 cage and a pedestal. I decided to make a pedestal as I didn't want the cage directly on the floor, nor did I want to have to crouch down too far to reach into the bottom cage.

We built 3 cages, each approximately 3' wide x 2' deep x 1.5' high. We were able to get 3 cages and a pedestal out of 3, 4'x8' 3/4" birch sheets. You could also use oak or maple depending on the grain pattern you prefer but birch is generally the cheapest. An even cheaper option is of course melamine. These cages will house my adult Corn Snakes and I plan on building 6'x2' versions that I can stack with these when my Dumeril's Boas require larger accommodations.
Single Cage Cut List:
2 x 36"x24" - Top & Bottom
2 x 24"x18" - Sides
1 x 18"x34.5" - Back
1 x 4"x36" - Bottom Trim/Litter Dam
1 x 2"x37" - Top Trim
2 x 2"x16.5" - Side Trim
When doing our initial cuts we left the side and top trim pieces an inch longer so that we could get the angle cuts aligned perfectly later on. Though you could always adjust the length of the sides or the top and square them off. You could also get fancy and look into moulding trims to make it more ornate.
There should be some leftover for a ledge piece which you can cut to whatever shape you prefer. I made sure mine where large enough to contain a large Exo Terra hide.
Pedestal Cut List:
1 x 4"x36" - Front
1 x 4"x34.5" - Back
2 x 4"x24" – Sides
To keep our pedestal frame from shifting around we cut 4 small triangular pieces out of leftover for corner supports (shown below).
Material List:
- Wood Screws (150 box, size 8, 1.5")
- Wood Screws (3-4, 3” for attaching the ledge)
- Wood Glue (optional)
- Drill and 1/8" Drill Bit
- Screw Caps, Wood Filler (optional)
- Vents (personal preference as to quantity and style)
- Adjustable Desk Grommet (for thermometer/stat probe access)
* Equipment (jigsaw, hole saw) to cut openings for vents and grommets
- 11"x24" Flexwatt (product info)
- Linoleum & Adhesive
* Check with a floorcovering company if they have leftover or samples for cheap
- Sandpaper/Sanding Block
- Stain or Primer & Paint for the outside of the cage (optional)
- Water-Based Varathane
- Cloths/Brushes to apply finishes
- Silicone
- Glass (2 x 13"x16-3/4" - the glass needs to be approximately 1/2" less the height of the opening to allow it to fit into the track, the overlap is personal preference though I would suggest at least 1.5")
* Ask at a glass shop if they have any leftover pieces they'd be willing to give you a deal on
- Glass Track, Plastic or Metal (I prefer plastic)
* The glass shop should carry it and some hardware stores as well
- Glass Door Locks
- Stick-On Finger Pulls
Since my dad has an air compressor we opted to use his nail gun as opposed to screws. If you are using screws you will want to drill pilot holes for them. I have used the term 'attach' in the assembly descriptions below as some may prefer to use nails, others screws.
I had a difficult time finding circular vents so I picked up some rectangular floor registers. If you are concerned with the size of the slits in the vents you could purchase some screen mesh to surround them and tuck through the back.
Pedestal Assembly:
Attach the side pieces behind the front piece and the back inside the side pieces. I chose this method of placement with the cages as well so that the front would not show any edge grain. Next place the 4 corners inside the frame and attach.

Cage Assembly:
Cut openings in the back piece or side pieces for the vents. We cut the opening for the grommet near the end of assembly and centered it above the heat tape, though you could get it done at this point. As we plan on eventually making more cages and stacking them side-by-side we placed our vents and grommet in the back, however if you prefer they can be placed on opposite sides of the cage.


Attach the sides to the back piece.

Then attach the top piece.


