• Hello!

    Either you have not registered on this site yet, or you are registered but have not logged in. In either case, you will not be able to use the full functionality of this site until you have registered, and then logged in after your registration has been approved.

    Registration is FREE, so please register so you can participate instead of remaining a lurker....

    Please be certain that the location field is correctly filled out when you register. All registrations that appear to be bogus will be rejected. Which means that if your location field does NOT match the actual location of your registration IP address, then your registration will be rejected.

    Sorry about the strictness of this requirement, but it is necessary to block spammers and scammers at the door as much as possible.

How to make your own Rheostat for less than $7! Detailed instructions.

DdotSpot

The Snewbie
If you are electrically challenged..hopefully this will be a good tool for you. Obviously there are many different ways that you can do this, but I thought it fitting to post simple and effective step-by-step instructions for an easy design.

DISCLAIMER: If you are under the age of 16, I would recommend adult supervision...remember, you are making an electrical device...electricity will be involved!!!


Ok let's start off with the ingredients....
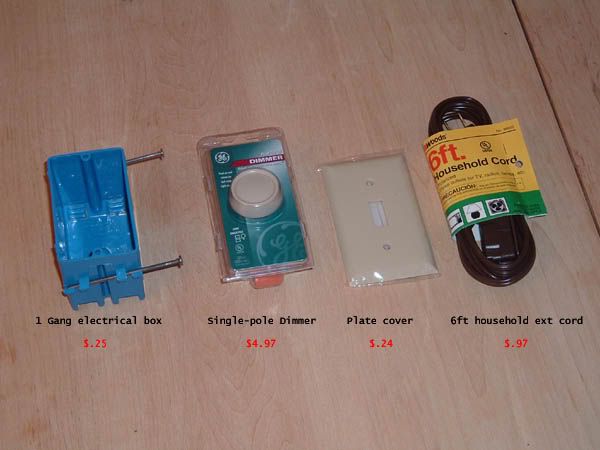
01_1.jpg


Here is my proof of purchase. All of these items you should be able to pick up at your local Wally World. If you can't find them there, you might try a local electric supply or Lowes.
01_2.jpg


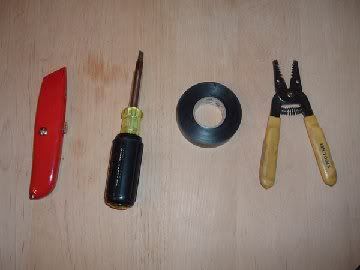
Here are the tools that you will need...I have a 12 in 1 screwdriver, but most likely all you'll need is a flat-head. The electrical tape is optional, but HIGHLY recommended.
01_3.jpg


OK...now for STEP 1:
Cut the exension cord approx. 1.5ft from the pictured end.
02.jpg


STEP 2:
Take the shorter piece of wire...
03.jpg


...and you want to split the two wires by using your razor blade to cut down the VERY center of the two.
04.jpg


Be careful and go slowly, you don't want to mess up and expose the wiring...
05.jpg


If you do, don't worry...electrical tape will patch that right up!
06.jpg


Also...be VERY careful with the sharp object and CUT away from your body...
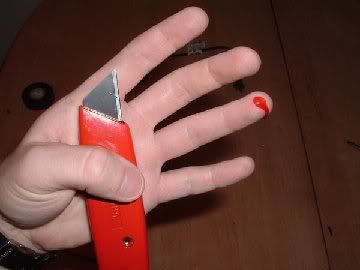
06_1.jpg


Not to worry again, electrical tape will patch that right up too!!
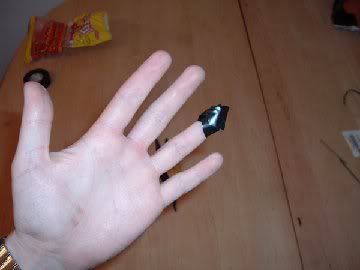
06_2.jpg


Continued on next post...
 
Step 3:
Use the wire strippers and strip about 3/4" to 1" off of the end of each wire.
07.jpg


If you don't have any wire strippers, the razor blade will work fine...just make sure not to cut too deep. Cut a circle AROUND the insulation and pull it off with your fingers.
10.jpg


STEP 4:
Take the other 'cut' end of the cord and do the same thing to it.
11.jpg


STEP 5:
Now take both ends and insert them into your single gang box
14.jpg

15.jpg


STEP 6:
You have to be VERY precise on this part...look for the wire that has the ridges on it...this is the NEUTRAL side...

16.jpg


Now connect BOTH of the ridged wires together by twisting the exposed wire. And put one of your wirenuts(should be included with the dimmer) around the twisted wire
19.jpg


I also suggest putting electrical tape around it to secure it and close up any potential fire hazard...never too safe!

20.jpg


Continued on next post...
 
STEP 7:
Take your dimmer(notice the 2 black wires and 1 green wire) and connect the black wires to the two remaining wires....It does not matter which one you connect them to...
23.jpg


Step 8:
Do not worry about the green wire...just stuff it in the box. This is the grounding wire, because there is no ground on the plug, it won't be used. Now screw the dimmer into your box as shown.
24.jpg


Step 9:
Put on the faceplate...
25.jpg


Step 10:
Your done!
26.jpg


However, I would recommend taping the back of it just to secure the loose wires and close any gaps
27.jpg
 
Please...if I left anything unclear, or you have any questions, please let me know. As I said before this isn't the only way to make one of these, actually I prefer this design over the other one, but its just a hair more expensive(not much though).
 

Attachments

  • Rheostat2.JPG
    Rheostat2.JPG
    35.4 KB · Views: 508
Dang D,
I am about the stupidest girl on the planet when it comes to all of this building stuff...but I have to say that now I get it (and will be trying this little home project over the weekend!)
Thanks for the visuals (it's the only way I figure this stuff out), and the extra advice.....especially all of those uses for electrical tape...who knew?? :rolleyes:

Now if only we could get you and Cav your own infomercial......"The Dan and Gary Do-it-Yourself Cornsnake Housing Series" :grin01:
 
I need pictures too, which is why I made these instructions with pictures, because most of us dummies require the visuals! I'm glad that it made sense to you, and I hope to hear a report as to how yours turned out.

Daniel

EDIT: ROFL...."This Old Rack"
 
daisy said:
Now if only we could get you and Cav your own infomercial......"The Dan and Gary Do-it-Yourself Cornsnake Housing Series" :grin01:
I'm picturing Kramden and Norton: "But can it core, a, apple?"

:eek1: "Yes, it can core, a, apple!"

----

Great job man, it couldn't have been made any simpler. Nice illustration of the side effects of not using a razor carefully enough. ;)
 
Dan - great tutorial. would you be willing to post pics or info on how to wire the second setup with the outlets?
 
If I get some time tonight, I'll try to post some instructions. Its the same exact concept as the other one, but I'll show you which wires to hook where on the receptacle.

Serpwidgets said:
I'm picturing Kramden and Norton: "But can it core, a, apple?"

"Yes, it can core, a, apple!"

----

Great job man, it couldn't have been made any simpler. Nice illustration of the side effects of not using a razor carefully enough.

ROFL!
 
Nice job, Daniel!!!

You're just a Norm Abrams "safety disclaimer" away from turning this thread into a PBS series!!

regards,
jazz
 
THANK YOU!! for that wonderful picture tutorial!! That helped a million! I will be saving this thread for future reference!!
Excellent job!
 
Daniel,

I look forward to seeing the instructions for the rheostat/outlet.

To everyone that is thinking about trying this, I want to let you know that it is VERY easy! I made 3 of them last night and a couple more today!
 
Back
Top