• Hello!

    Either you have not registered on this site yet, or you are registered but have not logged in. In either case, you will not be able to use the full functionality of this site until you have registered, and then logged in after your registration has been approved.

    Registration is FREE, so please register so you can participate instead of remaining a lurker....

    Please be certain that the location field is correctly filled out when you register. All registrations that appear to be bogus will be rejected. Which means that if your location field does NOT match the actual location of your registration IP address, then your registration will be rejected.

    Sorry about the strictness of this requirement, but it is necessary to block spammers and scammers at the door as much as possible.

DIY: Great Stuff Foam Terrarium Background

TripleMoonsExotic

I <3 Stripes!
NOTE: This terrarium is made of a 45g split into two sections with an acrylic divider. You will need more or less materials depending on what size tank you are using. Before actually attaching the peat moss (or any other organic material), I highly suggest microwaving or baking it to ensure all little nasties are killed.
________________________________

BASE LAYER

Materials
(2) cans of Great Stuff foam insulation
(3) pieces of driftwood
(6) river rock stones
(4) pieces of cork bark
(4) compressed peat moss planters

step1.jpg

I first sprayed a layer of Great Stuff foam down onto the back of the enclosure. I left 3-4" on the bottom for my drainage and substrate layers. Before the Great Stuff foam dried, I placed my driftwood and river rock where I wanted it. For planting small vines and other plants, I also placed compressed peat moss planters into the Great Stuff and hid them with pieces of cork bark. I let the first layer of Great Stuff sit for about 2 hours before going back and adding another layer to secure my decorative wood and rock and add more depth to the background.
________________________________

CREATING THE TEXTURED BACKGROUND

Materials
(4) tubes of black Silicone II window & door caulk
(1) bag of peat moss

Tools
Vacuum

step2.jpg

After allowing the Great Stuff to set for 12 hours, I tugged on the wood to see how secure the pieces were staying in. They aren't budging! For this part I used 2 tubes of caulk per side, and now my arm hurts from using the caulk gun so much yesterday! Anyway, starting from the bottom of the background, squeeze generous amounts of the black caulk in about 6" square sections. I used plastic knifes to spread the caulk around like peanut butter. Take handfuls of the peat moss and press it into the silicone before it dries. Keep doing this until the entire back is covered, let set for 12-24 hours.

step3.jpg

After letting the silicone and dirt set, I figured out a little trick to make sure that any spots I missed were found right away and fixed. After sitting the tank up and knocking the bulk of the extra off, I used my vacuum hose and ran the end about 1/2" from the background. This sucks off any loose dirt and will expose any bare spots. It will not harm the sections that are securely held in place with the silicone. Once bare spots are found, just use a bit of silicone and press the dirt in. I did this 3 times to make sure ALL spots were covered.
________________________________

ADDING MORE DEPTH

Moss:
step4.jpg

More Pictures Coming Soon...
 
Last edited:
Great idea! I used to think exo terra backgrounds were nice, but after seeing how easy it is to make a Realistic background i wont be looking for one anymore. Coool :D
 
What's an exo-terra background? Foam?

TME, I really like this design. To be honest, I didn't at first, but you've taken it a step that I've not seen before with the peat and the moss. I think there's really a lot you could do with this as a starting point, too. Do you think branches sticking out from the foam would hold the weight of an average corn? King? It seems that one it dries, it might not give a lot of support for an end heavy branch. I have you tried this at all?

I think the added moss really makes the whole thing "pop" in depth and color as well. And what's so great about the foam is that you an tack in different plants and silicone them in place. Even just a staple gun should work so you can have hanging vines and such.

Nicely done, TME. How long did the whole project cost you in time? And where oh where did you get the black silicone?? I can't find that stuff anywhere!

I really wish I'd not lost my pc that all my photos of my project on it. It's also a very simple piece and would be made even easier had I not had to make it marine safe.
 
What's an exo-terra background? Foam?

Yes, they are foam backgrounds.

TME, I really like this design. To be honest, I didn't at first, but you've taken it a step that I've not seen before with the peat and the moss.

Thanks. :) It's actually all setup and housing animals now...But I keep killing the plants I put in. :awcrap: My most recent plant victim is a bush of "baby tears." Once I have it all planted and thriving I'll post pictures of it completed. I think I'm going to give in and put an order in with Black Jungle.

Do you think branches sticking out from the foam would hold the weight of an average corn? King? It seems that one it dries, it might not give a lot of support for an end heavy branch. I have you tried this at all?

The wood that is sticking out of my background could no doubt hold an adult Corn (I haven't tested it, but I bet it could hold an adult BP). The wood won't budge no matter how much I tug on it.

How long did the whole project cost you in time? And where oh where did you get the black silicone?? I can't find that stuff anywhere!

Not including my plant issues, it took me about 72 hours to put the background together (giving time to dry between layers). I found black silicone at Lowes where all the other silicone is. You have to look closely at the tubes, they actually have quite a few different colors. Next time I'm in Lowes (which might be this weekend, we need to pick up some trim) I'll take a picture of the tube.
 
NICE! FYI I once made a 5' tree using this same method for an exhibit at the local science museum where I volunteered. We made a 2x4 frame, covered it in chicken wire and then foamed / mossed it. It went into a huge viv that was big enough for me to walk in....I wonder if it's still there?

The point is...this stuff is STRONG....and will basically last forever. We had bromeliads and spanish moss growing all over it and it really did look real...
 
I've used that product myself for quite a few projects. Nice job coming up with a new use. :cheers:

It really is great stuff!:blowup:
 
How do you keep it to adhere? I have pics buried somewhere of trying to make a great stuff background that I painted with Krylon Fusion. In three days, it just "fell" off the glass in one piece! I never tried it again, but figured you must need to score the inside glass or something.
 
How is this working out cleaning wise? I need some background in my snake's viv but I don't want to make it a pain to clean.
 
How do you keep it to adhere? I have pics buried somewhere of trying to make a great stuff background that I painted with Krylon Fusion. In three days, it just "fell" off the glass in one piece! I never tried it again, but figured you must need to score the inside glass or something.

The Great Stuff is all that is holding it in place, and I've tried tugging at it to tests its strength/durability and it won't budge. The only way it's going to come off at this point is if I take a blade to it. Maybe you didn't allow enough dry time before painting or then newer Great Stuff foam (I did this about a year ago) is much stronger then the older kind?

Alan said:
How is this working out cleaning wise? I need some background in my snake's viv but I don't want to make it a pain to clean.

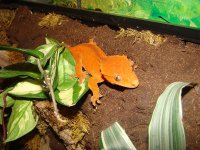
I keep arboreal geckos in it, so clean up is minimal on the background (arboreal geckos like to poo on the glass). When they do poo on the background, I lightly spray it with water and gently wipe the poo off.

This method btw, I use with a "bio substrate." So it's not like I use this with wood shavings, paper towels and the like.
 
NOTE: This terrarium is made of a 45g split into two sections with an acrylic divider. You will need more or less materials depending on what size tank you are using. Before actually attaching the peat moss (or any other organic material), I highly suggest microwaving or baking it to ensure all little nasties are killed.

I have been looking ever since i got my snake in building my own viv
Today I stumbled upon "Great Stuff" and via google i found your great pics.

And I tought ...That is a link I should post on cornsnakes.com.... it was already here.
You mean you can microwave your own pieces of wood...
Lichen...actualy these are an animal ;)
 
just a quick question, could using peat / moss cause health issues for snakey

prolong high humid potentially = scale rot or growth of other bacteria which could cause snakey infections etc?

jus curious
 
No, it won't cause problems. The amount of peat moss on the back is minimal after you knock the access off and vacuum. The background itself doesn't hold a lot of water, I spray it and the background is dry within an hour. Plenty of ventilation will also help access humidity concerns. This one I built was used for Cresteds and will be used for Darts eventually. This viv was torn down (the background is intact) because we're remodeling, but I'll see if I can get to it so I can get some macro shots of what the background actually looks like up close. It's difficult to describe, but their is only a light texturing of the loose soil, it's not really caked on thick.
 
Well here we go, a close-up of the background. Got lucky and found this one on my hard drive with little effort. This was taken when I first built it (2007/2008), less of the peat is on the background now from use, but I like how it looks.
 

Attachments

  • terrarium_1.jpg
    terrarium_1.jpg
    188.6 KB · Views: 121
What a difference once you added the moss during construction...it's beautiful! Looks like it's standing up pretty well since '08. Very cool!
 
I started...and I figure I can do one better...pics comming soon...
As I am building a custom viv anyway
1 ft + deep 3.5 ft wide 1.5 ft heigh ...and all is going to be wood par the doors ...i figure
Why not go for three Climbing walls

So I made my poine housing (as it paints nice...
On the bottom there is going to be a glass plate under which my UTH and siliconed in

I am going to use that thin material they use in the back of cheep presses....
One inside back side and two pieces for left and right.
Use expanding wall/plasterboard plugs and drill from the outside in to keep these bits in place..... the bolts are going to stick through about 0.5 to 1 inch... then greatstuff it and wait till it dries.... Unbolt...take the part ourt and cut the sides loose under 45 degrees from the backpart...And proceed as in the start topic.
Going to aim to have the fromnt part of the sides ...less thick than the back part .

Then after all is turfed and mossed.. I can clamp/bolt the parts back in and I hope to have a "solid" surraound wall

Justy hope it works....
 
What's an exo-terra background? Foam?

TME, I really like this design. To be honest, I didn't at first, but you've taken it a step that I've not seen before with the peat and the moss. I think there's really a lot you could do with this as a starting point, too. Do you think branches sticking out from the foam would hold the weight of an average corn? King? It seems that one it dries, it might not give a lot of support for an end heavy branch. I have you tried this at all?

I think the added moss really makes the whole thing "pop" in depth and color as well. And what's so great about the foam is that you an tack in different plants and silicone them in place. Even just a staple gun should work so you can have hanging vines and such.

Nicely done, TME. How long did the whole project cost you in time? And where oh where did you get the black silicone?? I can't find that stuff anywhere!

I really wish I'd not lost my pc that all my photos of my project on it. It's also a very simple piece and would be made even easier had I not had to make it marine safe.

I used a few decking screws to be sure to be sure.
Hold my inside panels nicely in place as well .
(I did not spray on the inside of the enclosure..i used a wooden panel (or rather three)
Left back and righ side, these are connected with steel 90 degree hooks so neither ofd the side would flop.

This afternoon my 18 month old girls decided to climb onto the planter in front of which i had put my "inset" while giving the actual viv box another paint
She used a branch set in the back as a foothold... it held I'm proud to say
 
Back
Top